# Use Ecommerce in the Flow
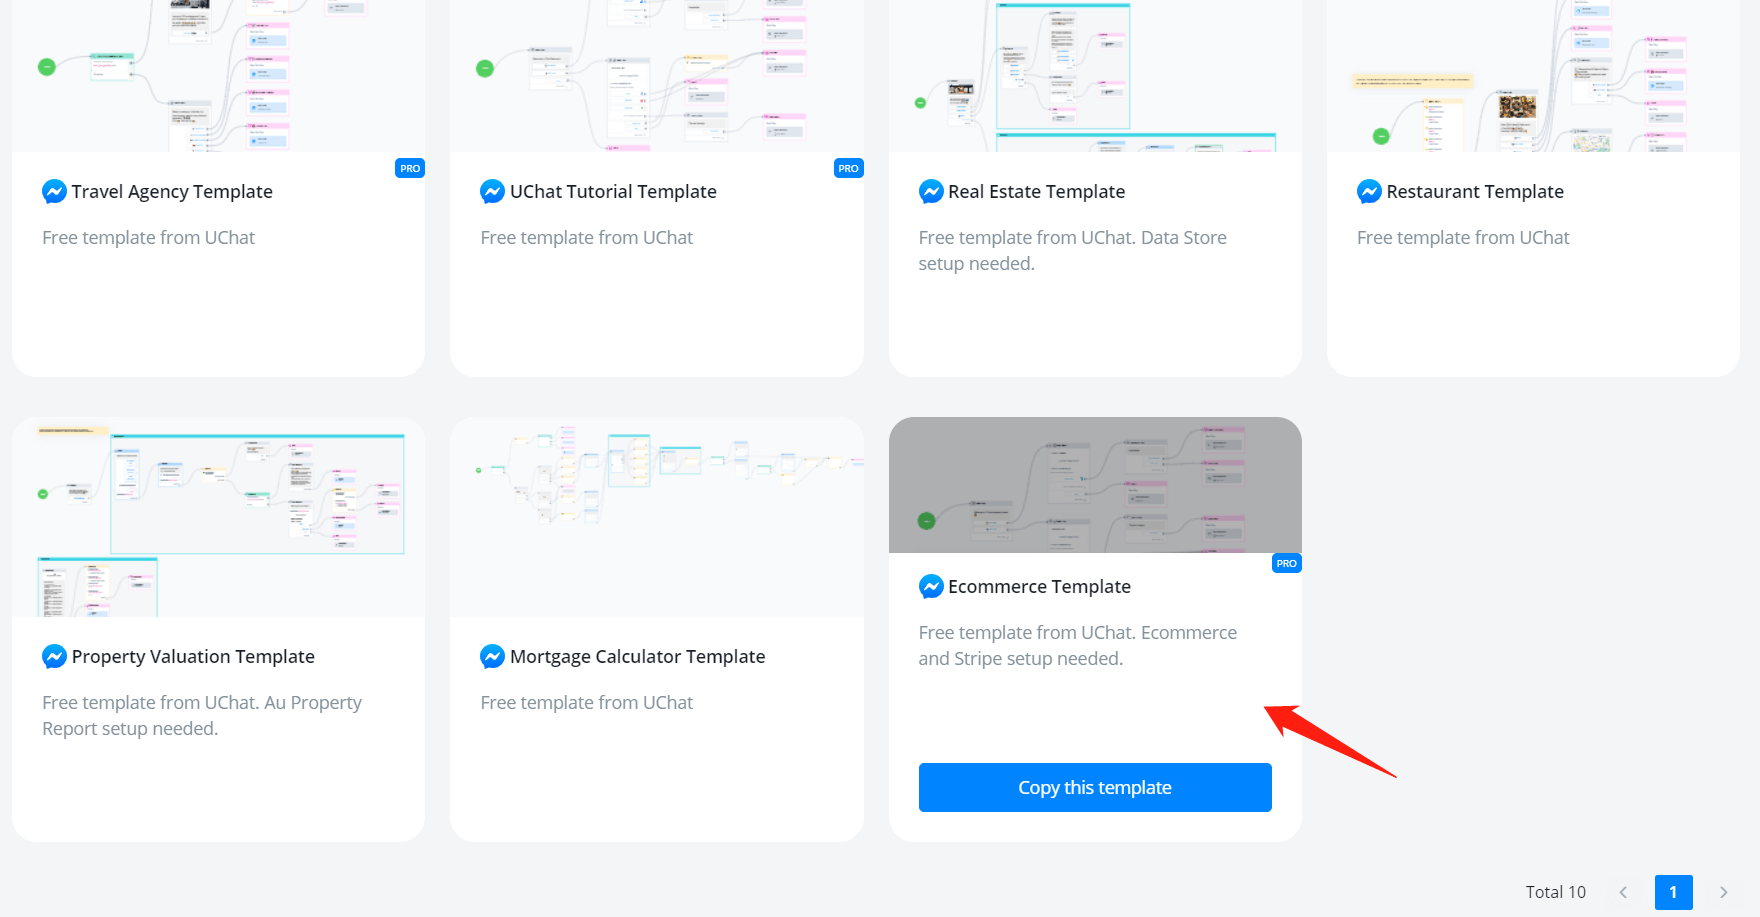
You can check this "Ecommerce Template" for inspiration after you setup your ecommerce system.
# Show Products
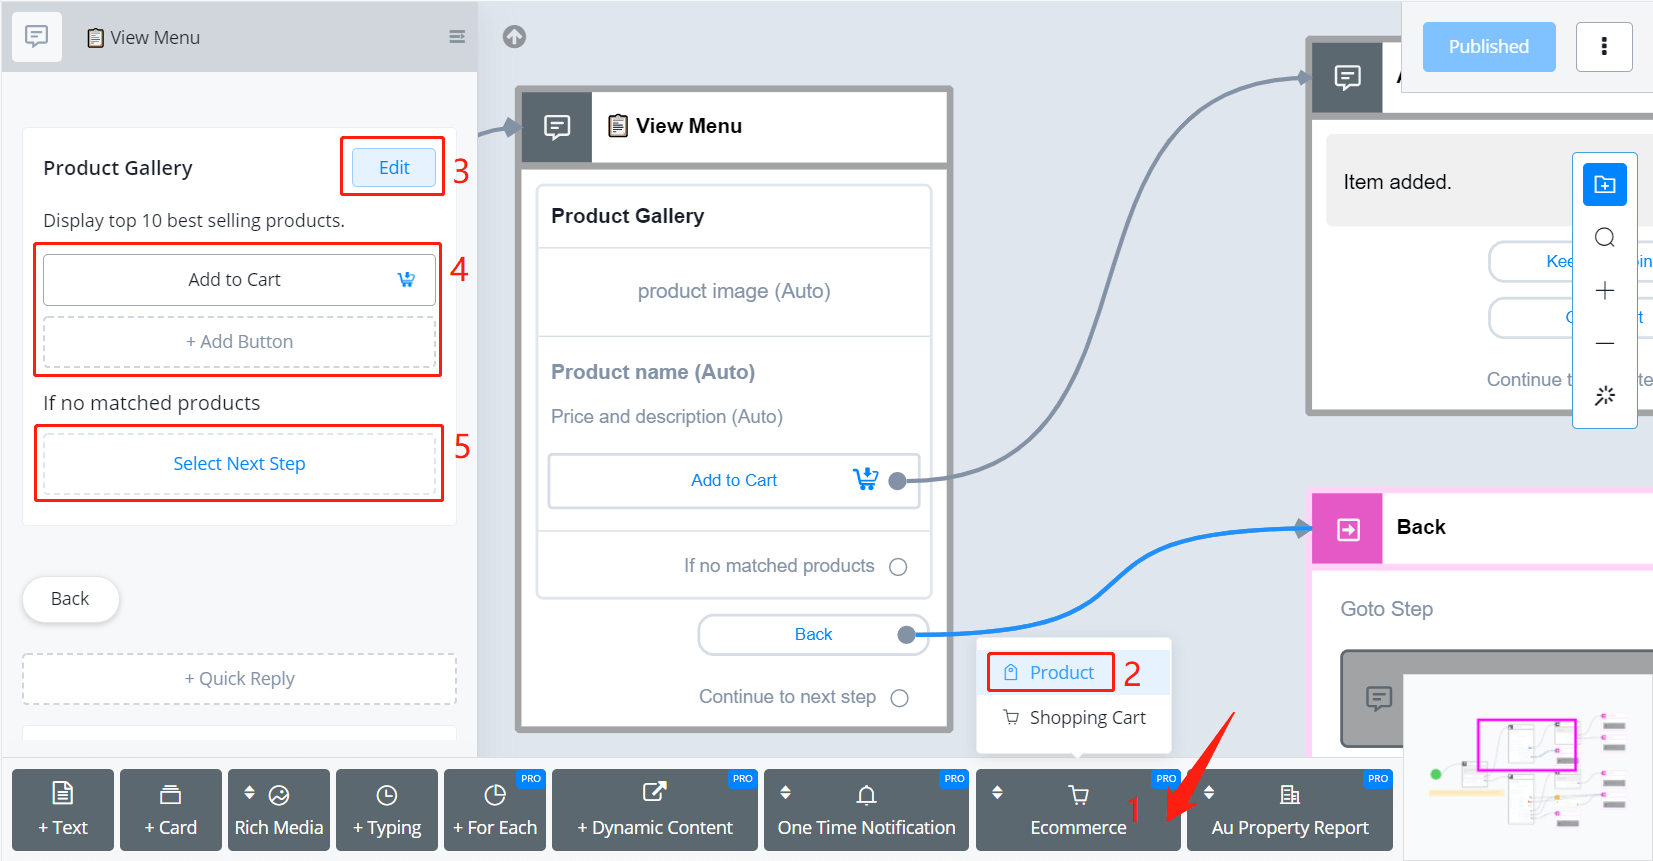
In a Send Message step, find "Ecommerce"(1), "Product"(2) and then click "Edit"(3). Buttons added at area 4 will show under each product. And don't forget to put prompt at area 5 in case no product matched.
WARNING
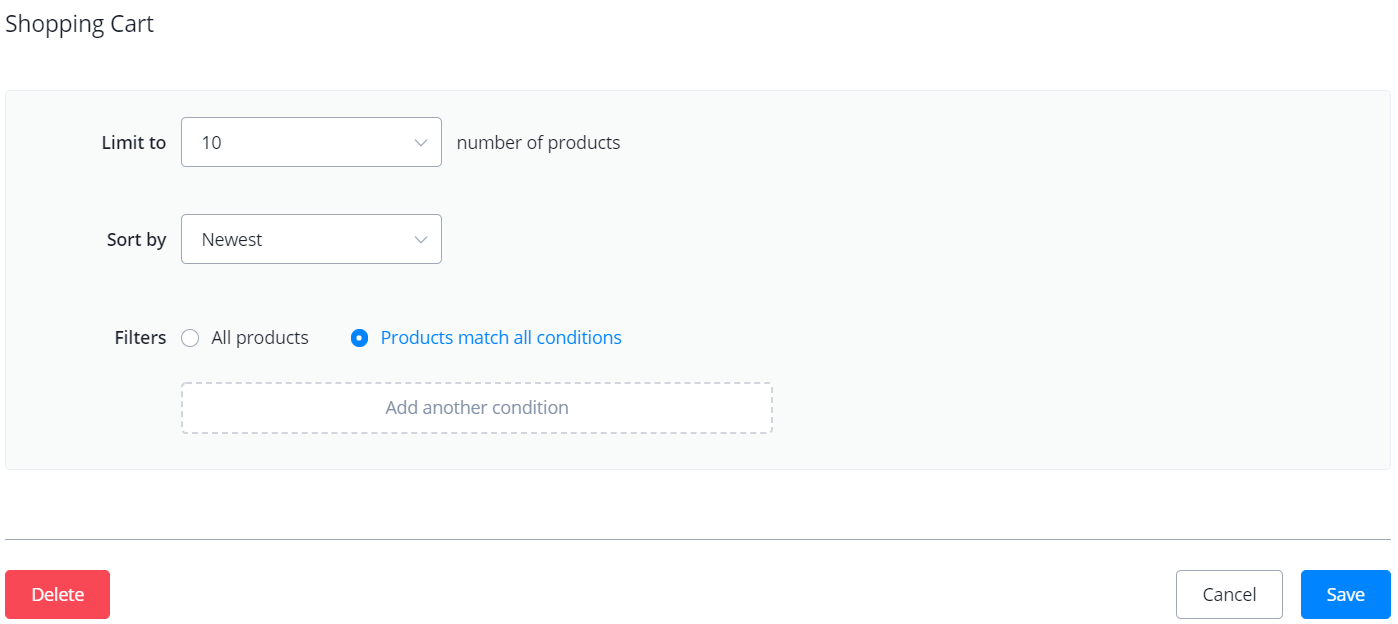
Due to the fact that Facebook allows only 10 cards displayed at one time, you might need to apply a filter to narrow down the products.
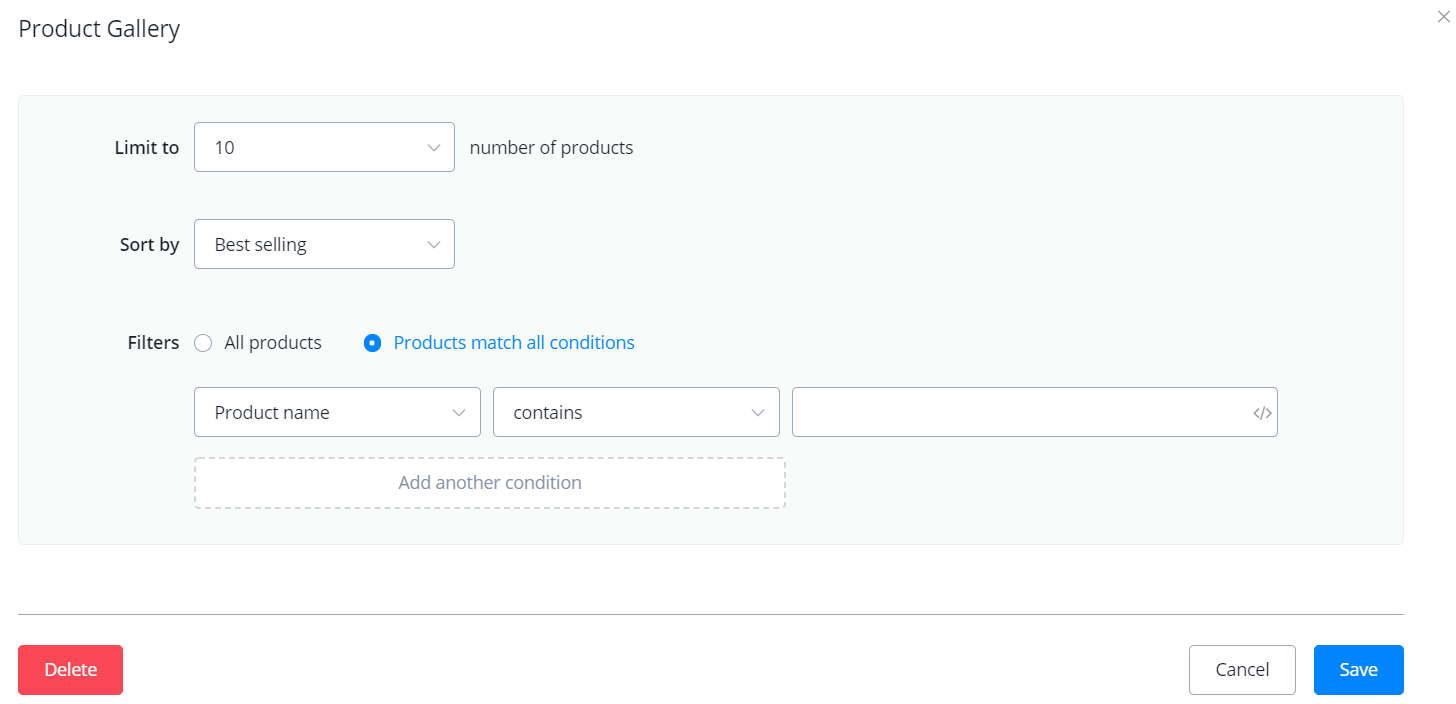
- choose how many products to show from 1 to 10
- select a sorting condition according to the user's choice
- set a filter with as many conditions as needed.
# Add to Cart
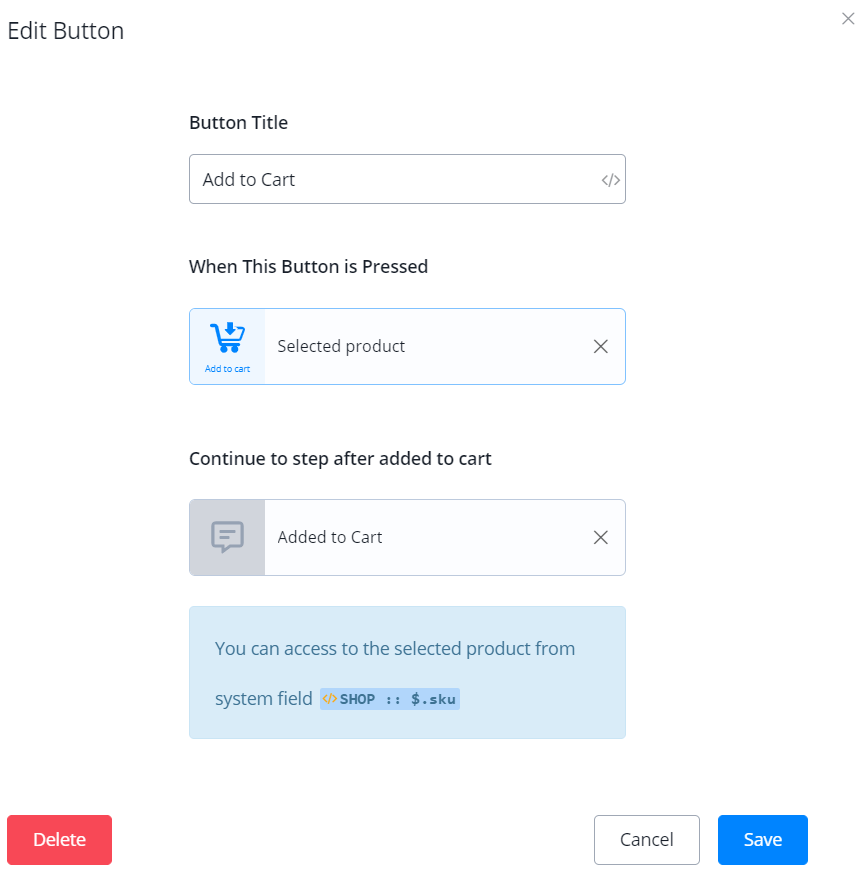
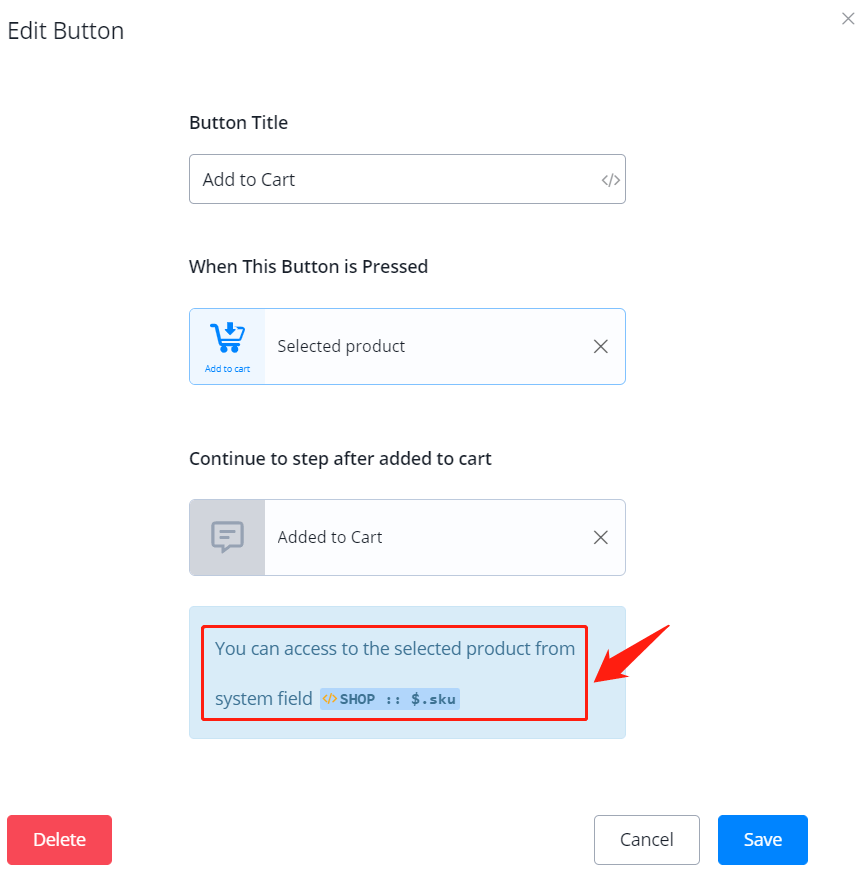
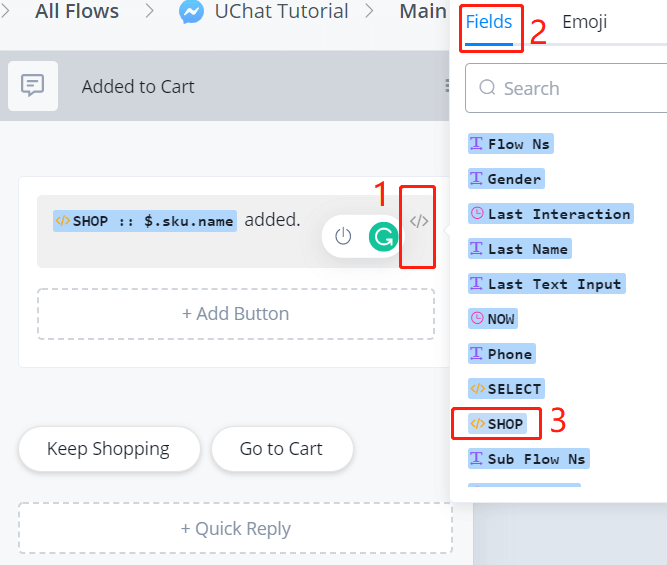
Select "Add to cart" when the button is pressed. It is good to prompt what was added as well. Get information of the added product from the "SHOP" JSON variable.
# Show Cart
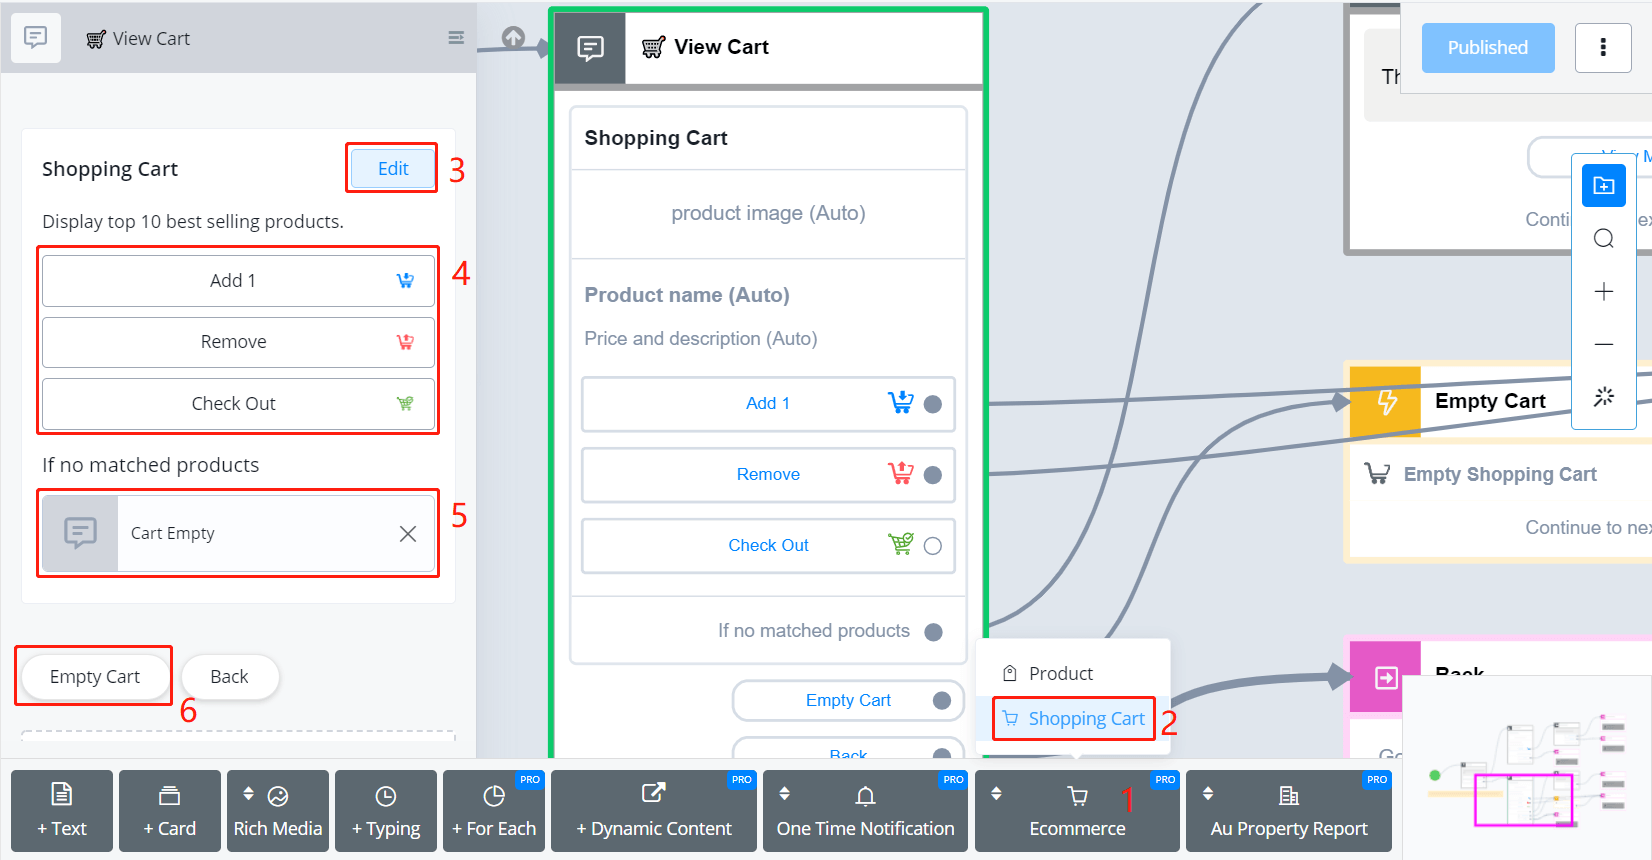
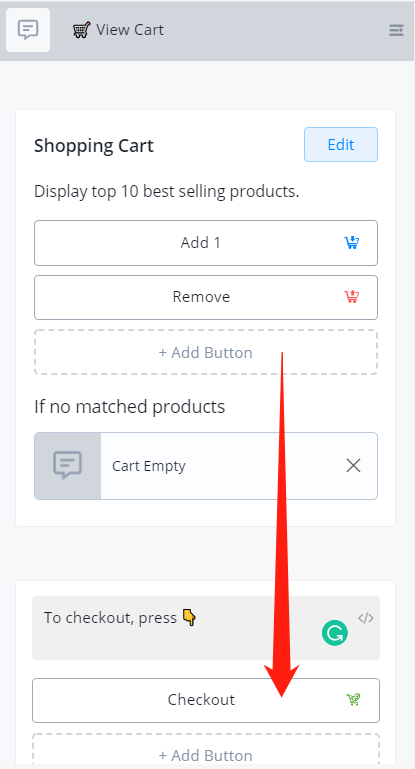
Find "Shopping Cart" under "Ecommerce", click "Edit". Again, any button put at area 4 will display with every product.
The edit page of "showing cart" is similar to the "showing product"'s. But it's a bit trickier. Because a cart has to show every product for reviewing before checkout.
TIP
if a customer picks more than 10 products but below 20, try using "Newest" to show the first 10 and "Oldest" to show the rest. It's rare but what if it's more than 20? Maybe try listing products by price range or first letter. Alternatively, you can also customize some Send Message steps to show the cart rather than using the "showing cart" function. Access cart information in "SHOP" JSON variable and "$.cart.num" of "SHOP" for items number in the cart.
# Remove from cart
Select "Remove from cart" when the button is pressed. You might want to use a Goto step to go to the cart again to refresh, since there are quantities shown with products that differ from showing a static menu.
# Empty Cart
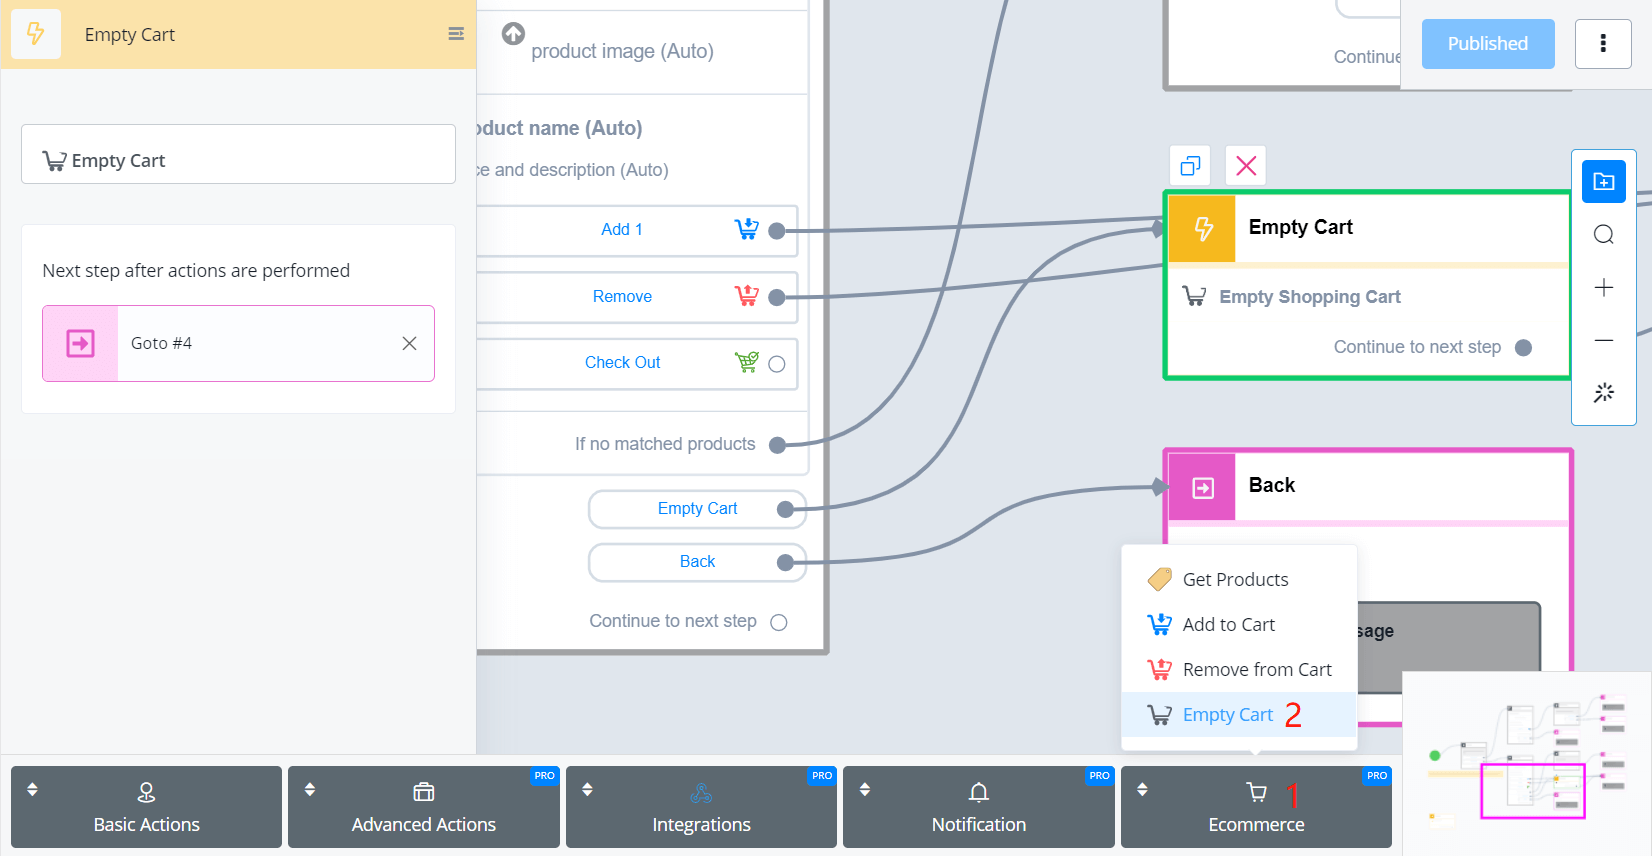
Select "Empty Cart" when the quick reply is pressed. Why not button? Because it can be redundant to have more than one empty cart following all products. Besides, "Empty Cart" is in the Action step, not a button action. So you will need to select an Action step as the next step to the quick reply.
# Checkout
TIP
to simulate the checkout process, you will have to setup your Stripe Integration as well. Check how to setup Stripe.
We've just talked about it's redundant to have an "Empty Cart" button with every product but why put multiple "Checkout"? This is because, actions in the Action step is processed at the backend while "Checkout" requires the frontend to open a website, the checkout page. So you can only call "Checkout" at a button.
If you don't want to put "Checkout" under each product, try adding one more text-type information after showing the cart:
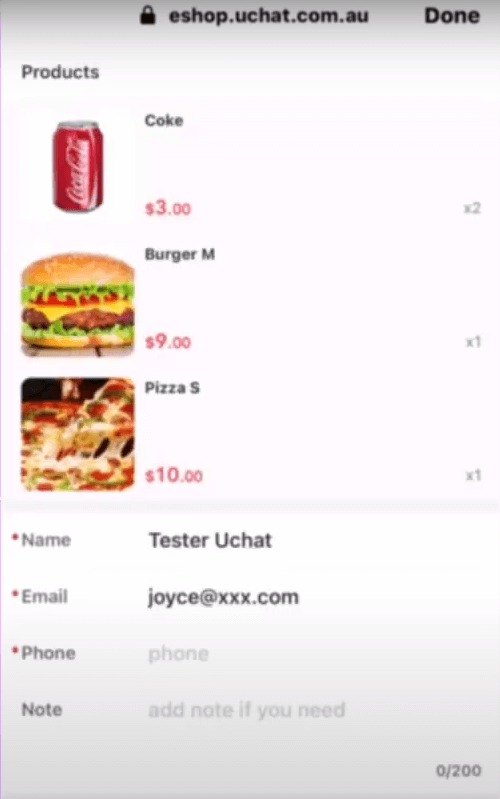
When users checkout, a list of products will show with quantity and price first, following by an area to leave users' contact details:
Keep scrolling down you will see delivery options, coupon code and a summary of the order.
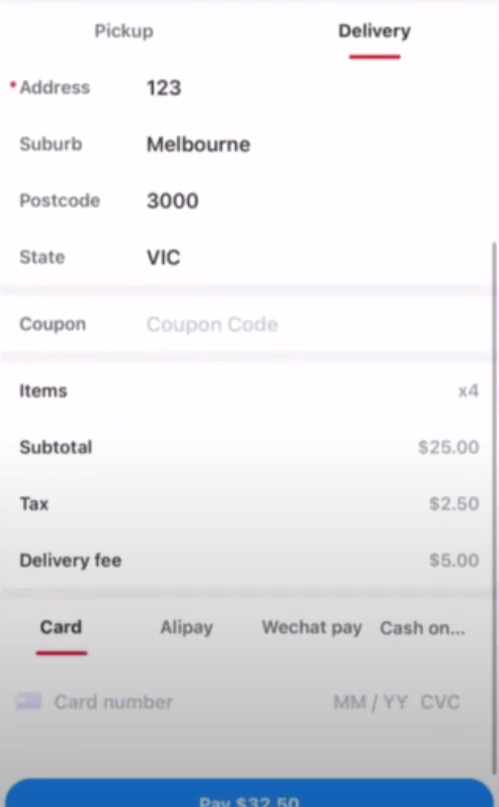
Finally, by selecting a payment option and clicking "Pay $xx.xx", the page will be directed to Stripe.com. If you are under a text mode, you will see this:
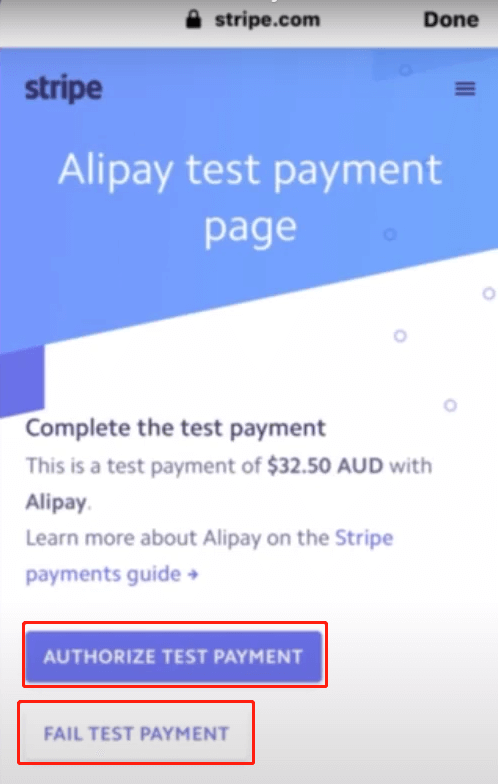
Click "AUTHORIZE TEST PAYMENT" or "FAIL TEST PAYMENT" to test what will it look like when the payment succeeds or fails.
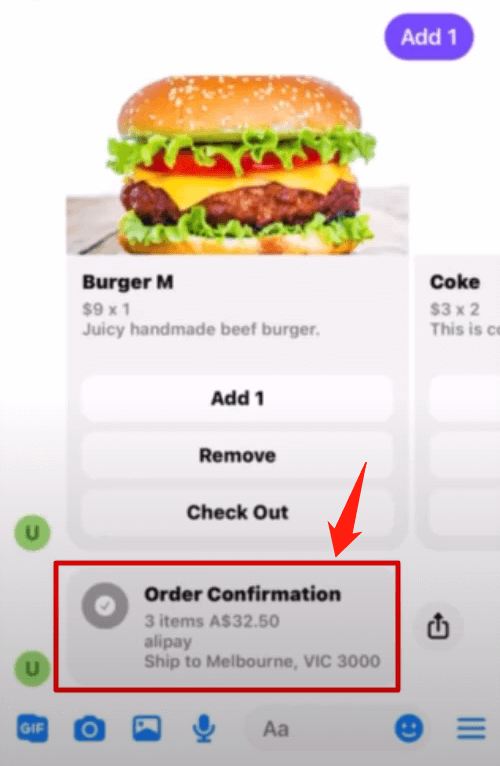
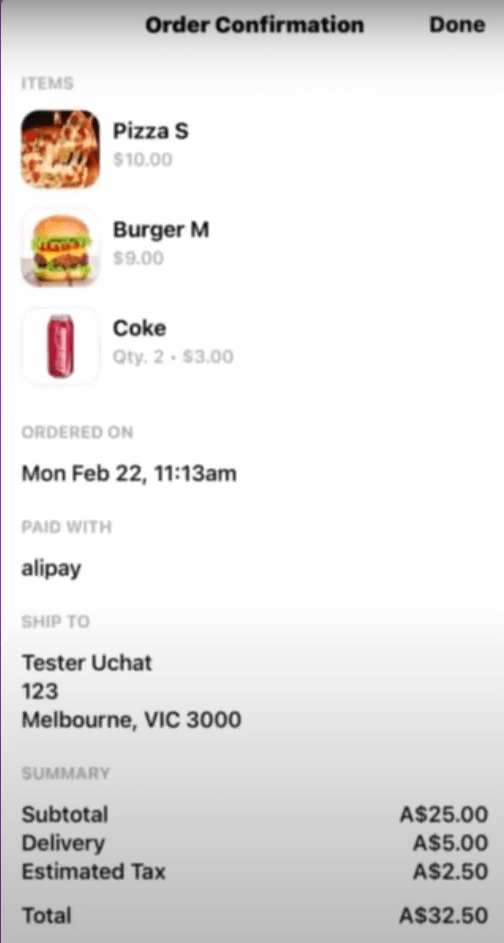
An order confirmation will be sent when payment succeed. Click on the confirmation to view the order detail.
# "Buy" Only One Product
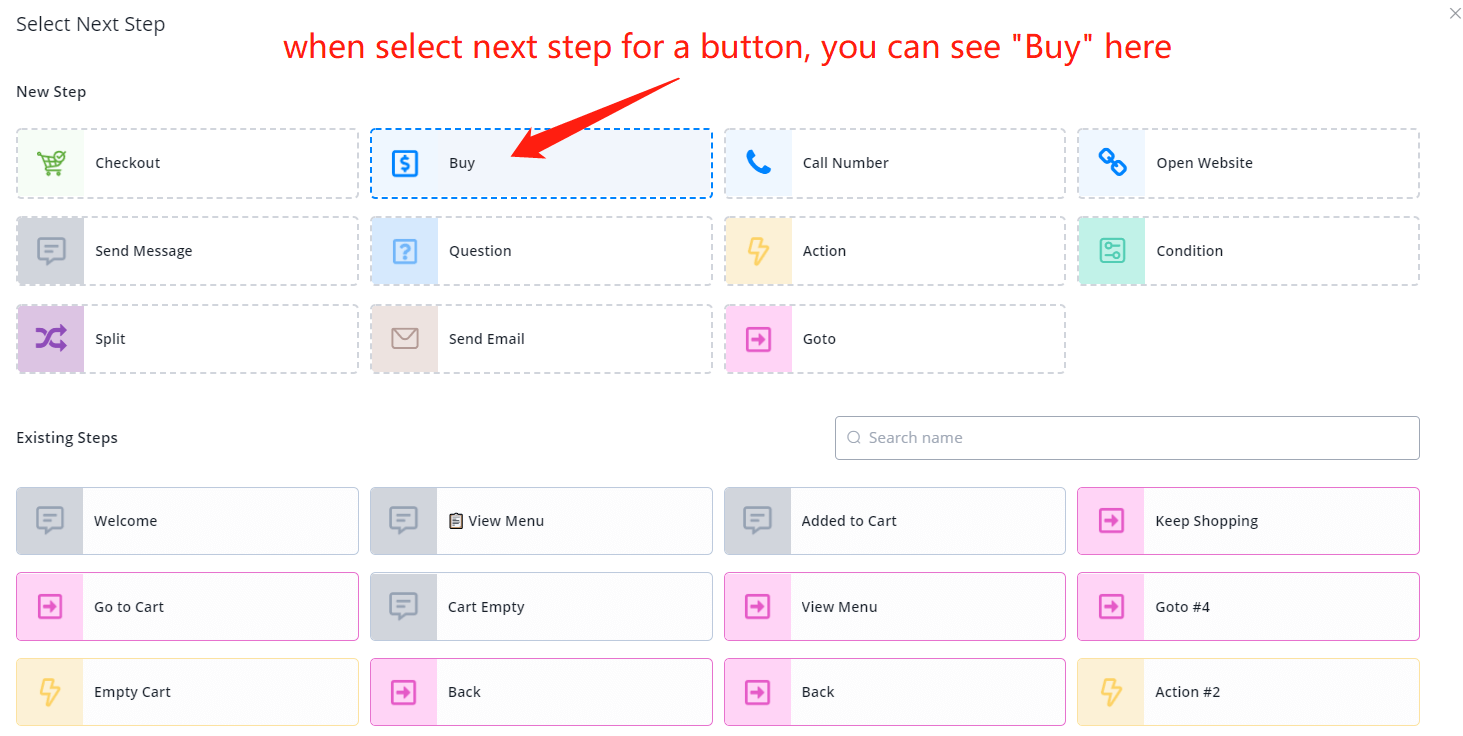
"Buy" is actually a feature having nothing to do with the built-in ecommerce system. After setting up your Stripe Integration, users can purchase one product (can be from your Stripe account) with one click on the "Buy" button with no ecommerce system setting at all.
The feature is suitable for ticket product without options or paying subscription fees, etc.
# How to use System JSON Variable
There are several system field storing information about the ecommerce system. Usually, the system will tell you where to find according to data like this:
You can access them wherever you see "</>":
# System JSON - "SHOP"
"SHOP" stores all information about your ecommerce settings.

# System JSON - "ORDER"
"ORDER" stores the user's last order. You only get an order after checkout.

# System JSON - "CART"
"CART" stores the user's shopping cart.

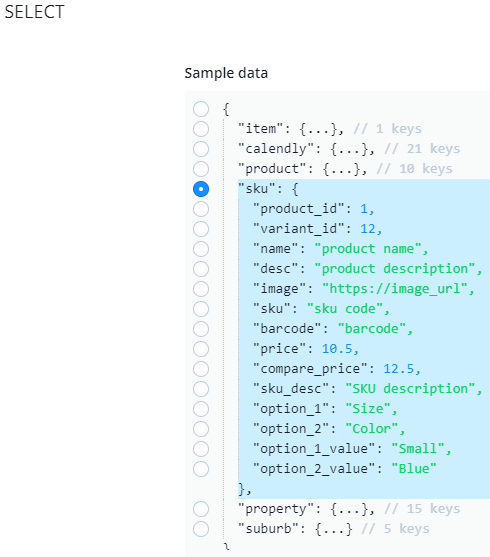
# System JSON - "SELECT"
When you choose "Select" when a button pressed, the selected item is stored in "SELECT".
SELECT.product:
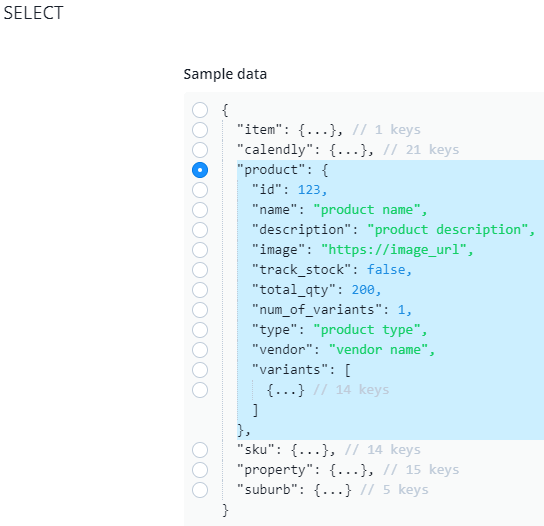
SELECT.sku: