# Custom Fields
# Bot fields
Similar to user fields you can also create bot fields. The main difference is with user fields you store data to segment and share with that specific bot user, and bot fields allow you to store data and show them all equally among all bot users.
The value does not change. Think of information such as opening hours, or contact details for the business.
# Creating a bot field
You can create a bot field by going to the bot field overview tab.
You can do so by pressing Contents from the left-hand menu and from there press the tab called Bot Fields.
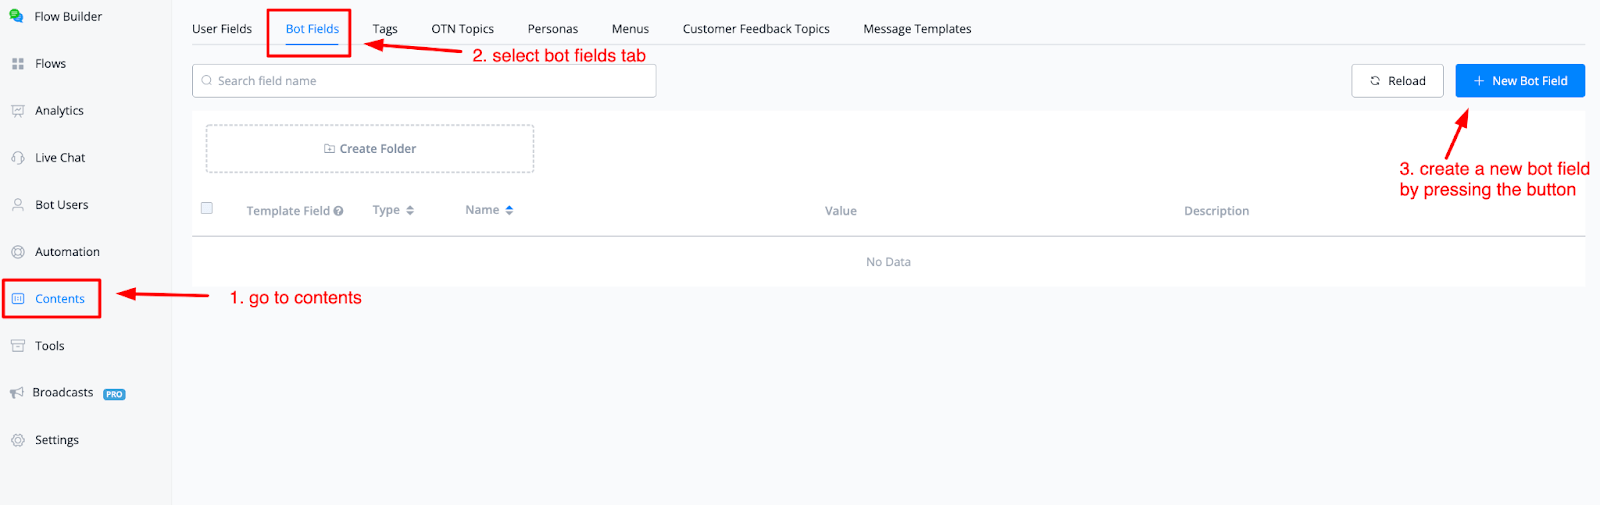
If you want to create a new bot field just press the button in the top right corner named + New Bot Field.
From here a pop-up window will appear where you can create your bot field.
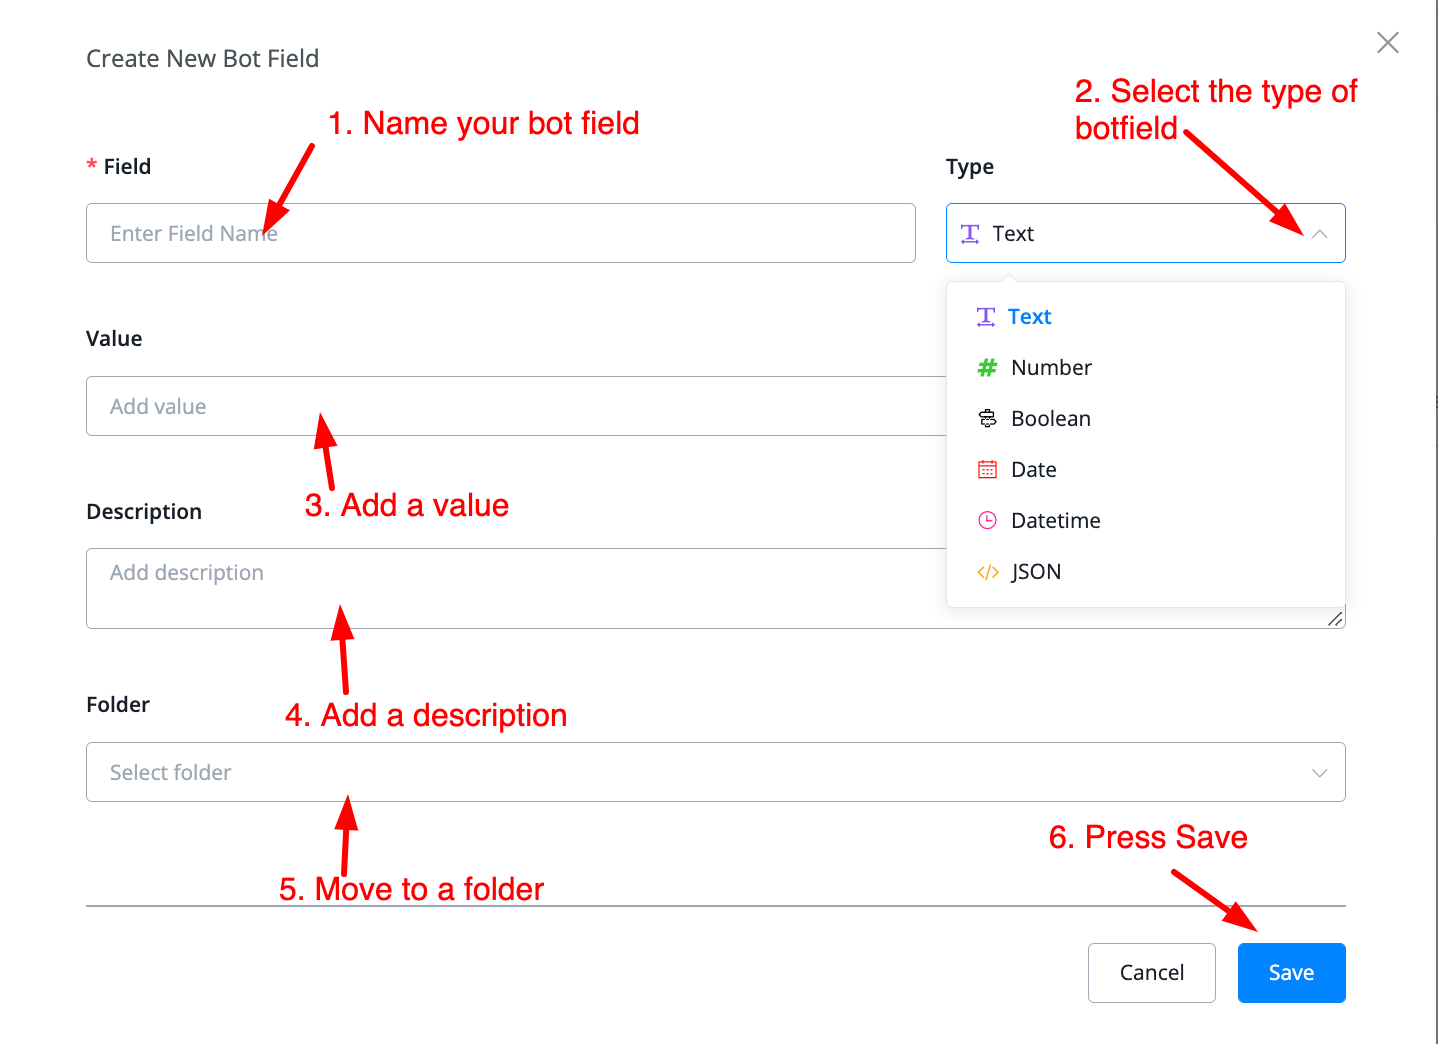
After naming your new bot field you can select the type of field you would like it to have.
Currently, we have the following ones available for you;
- Text
- Number
- Boolean
- Date
- Datetime
- JSON
After selecting the type you can start adding the value to this bot field. If you like a description can also be added same as the folder you want to move it to.
After everything is filled in just press the button in the bottom-right corner named Save to create the bot field.
# Managing your bot fields
After you created the bot field you are able to manage it from the main overview.
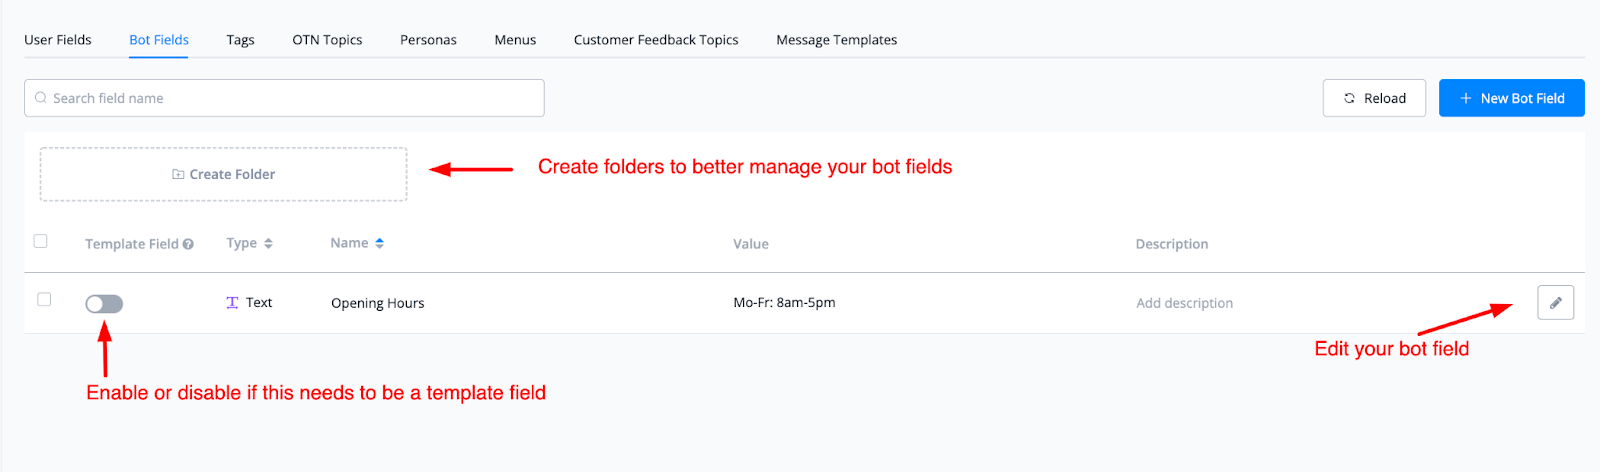
You can create folders to better keep track of your bot fields. You can also enable or disable the template field option.
Lastly, you are able to edit the bot field itself by pressing the pencil icon to the right of any bot field.
# User fields
User fields can be used to store data you collect from your bot users throughout the conversations you have with them.
It will help you segment the users inside of a flow and allows you to create more customized funnels that will help you convert.
# Creating a user field
There are two ways to create a user field. We will explain both steps in this documentation.
# Create User field in tab overview
To find the user field overview press Contents from the left-hand menu and then select the User fields tab.
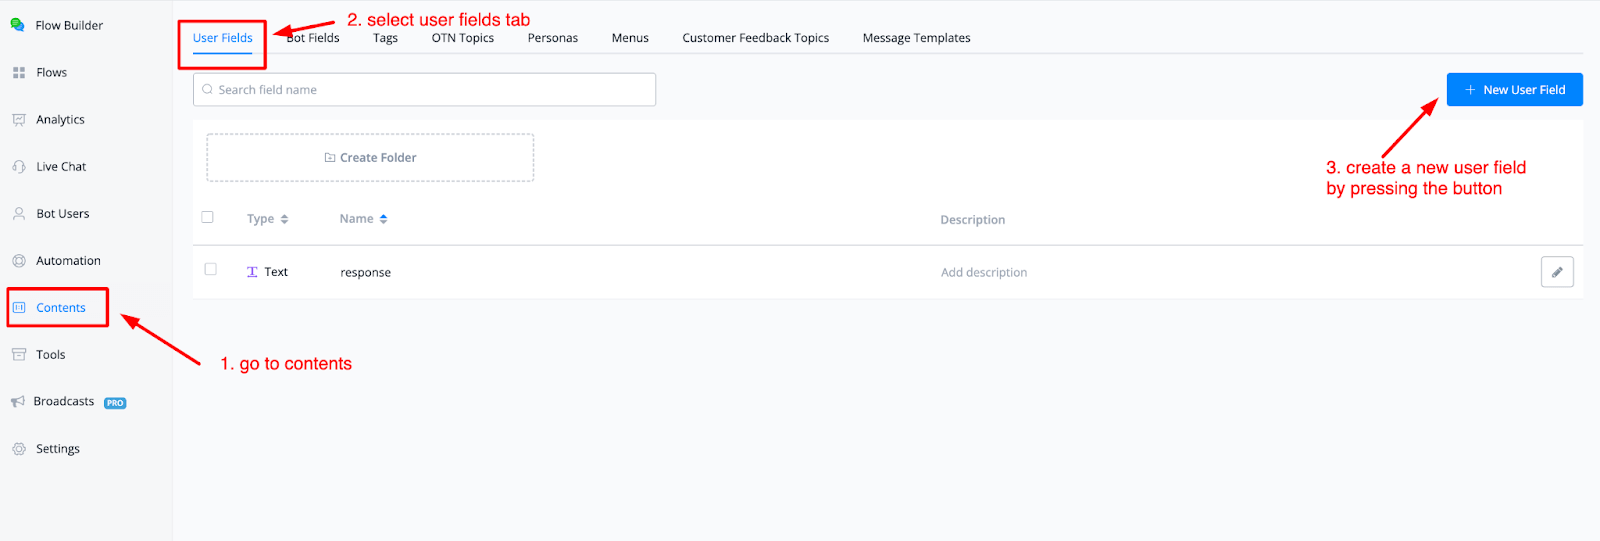
From here you will come to your user fields overview where you can manage all of your user fields you create.
To create a new user field press the blue button in the top right corner named + New User Field.
From here a new pop up window will appear where you will be able to set up your new user field.
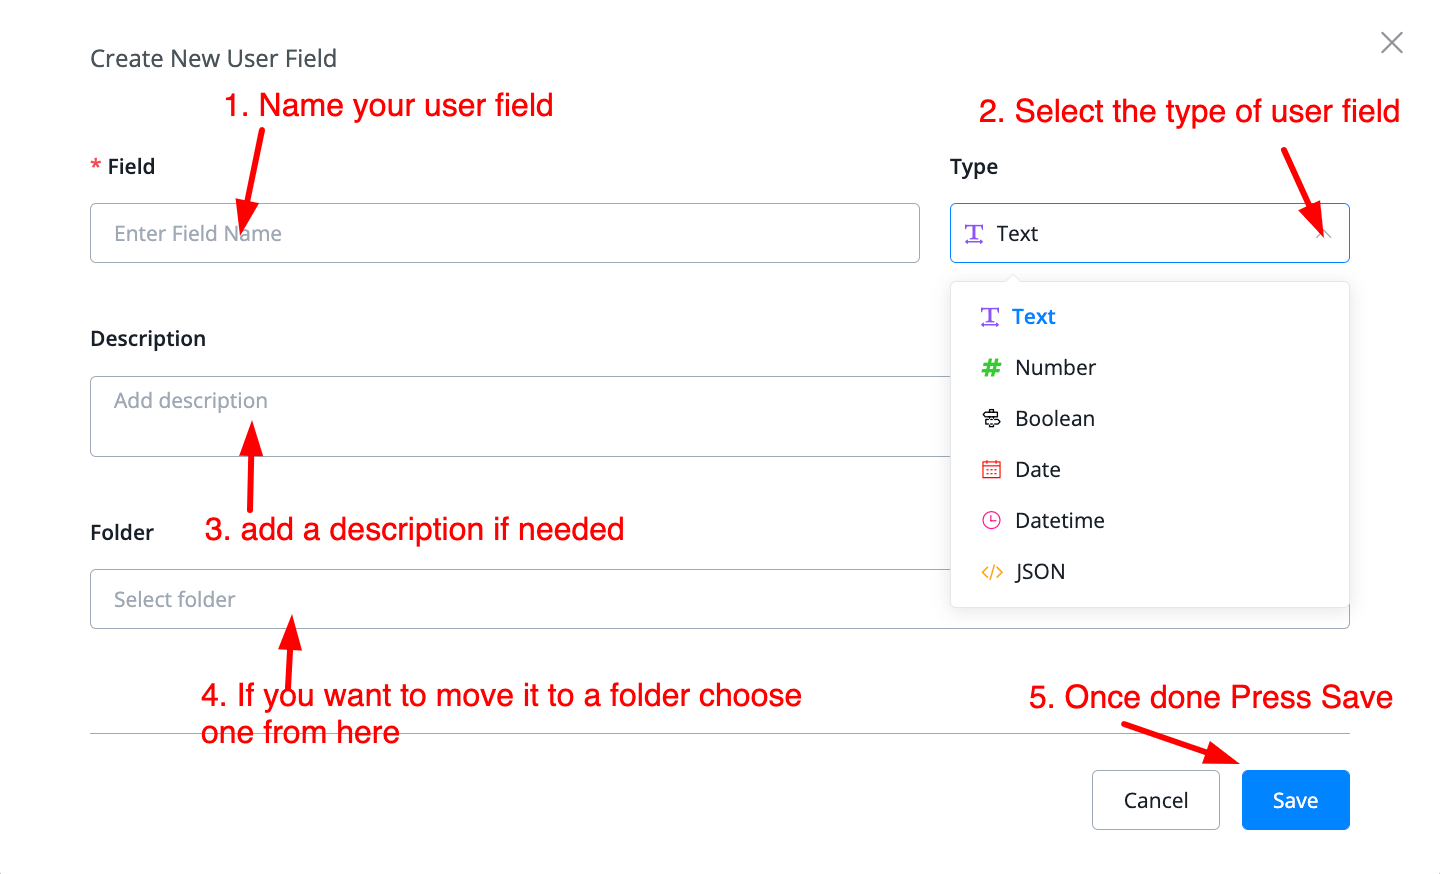
Just name your new user field. The next step is to select what kind of user field you like to create. Currently, we have the following available for you:
- Text
- Number
- Boolean
- Date
- Datetime
- JSON
These fields allow you to set up all kinds of options inside your chatbot including saving data from bot users or API calls as an array.
You can also add a description if you like and or want to clarify what the function is. Below the description, you will be able to select whether or not you want to move it into one of the folders you might have created to keep user fields more structured and easy to find.
Once you are done just press the blue button in the bottom right named Save and your user field will be created.
# Create user field inside flow builder
Another way to create a user field is by doing so directly inside the flow builder. This has the huge advantage that you can create user fields on the fly and not have to go to the user fields overview tab first.
Just go to any flow and from here you can create user fields anywhere you need to use them.
You will be able to create them inside of:
- Question blocks
- Action blocks -› set custom variable
- External request -› response tab
Let’s take an example of a question block. We are wanting to store the response to the question inside of a new user field.
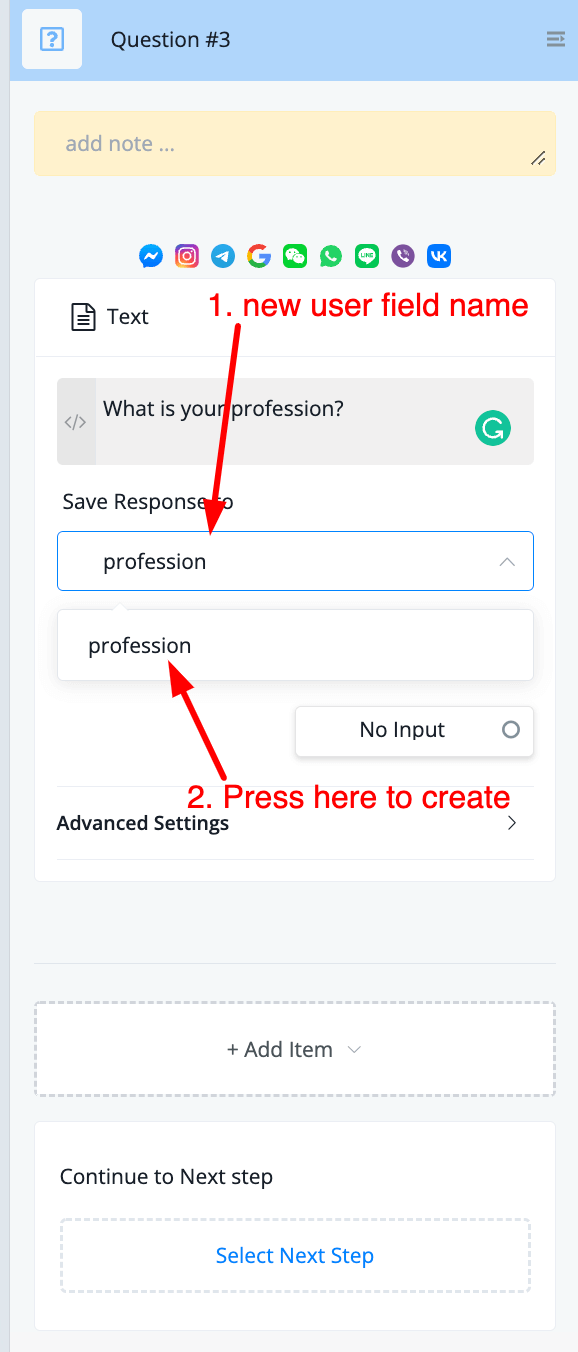
Just start typing a new user field name. The next step is to press the same name below your typed one to create the user field on the spot.
You will then be asked which type of user field you would like to create. Depending on where you are or what kind of question you get to see different kinds of options.
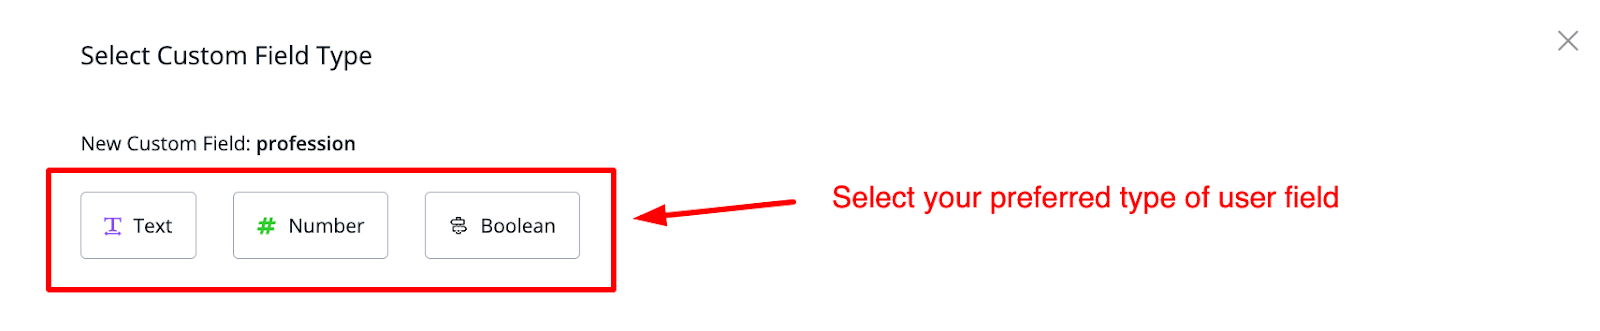
In this case, since it is a regular question block we get to see;
- Text
- Number
- Boolean
Were you to ask for a date/time type of question you would get to see that type of custom field only.
# Managing your user fields
To manage all your user fields you can do so at the main user fields overview tab.
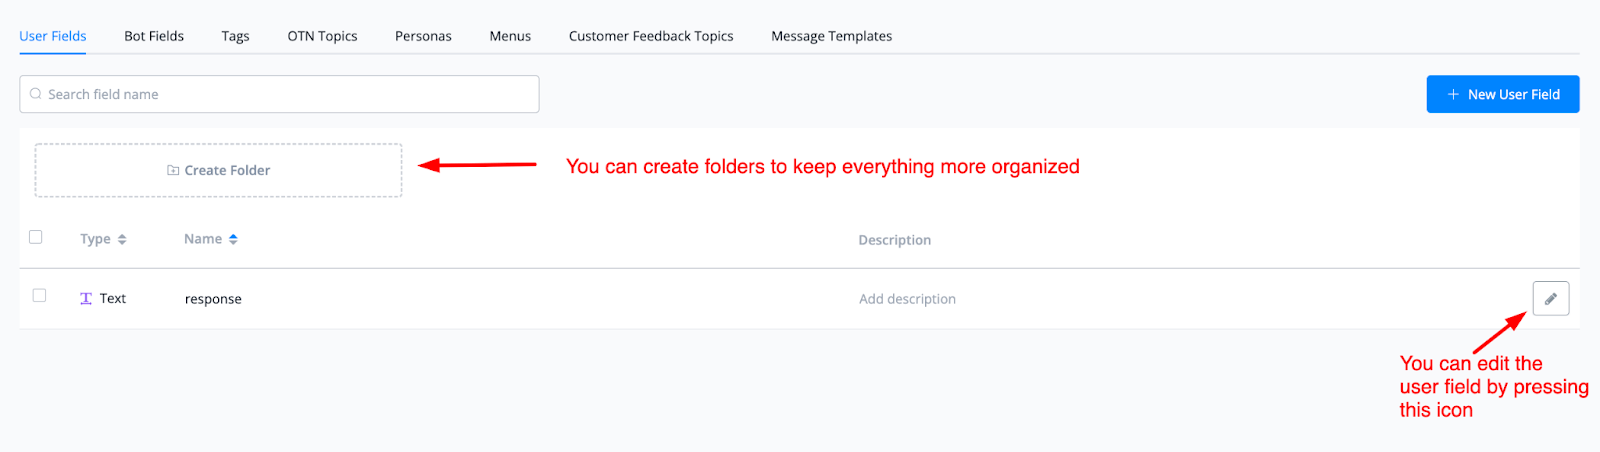
You can create folders to keep your user field overview more structured and let you allow to find your user fields more easily.
And you can manage any user field directly from this tab overview by pressing the pencil icon to the right of any user field.
← Comment Keywords Tags →