# Overview
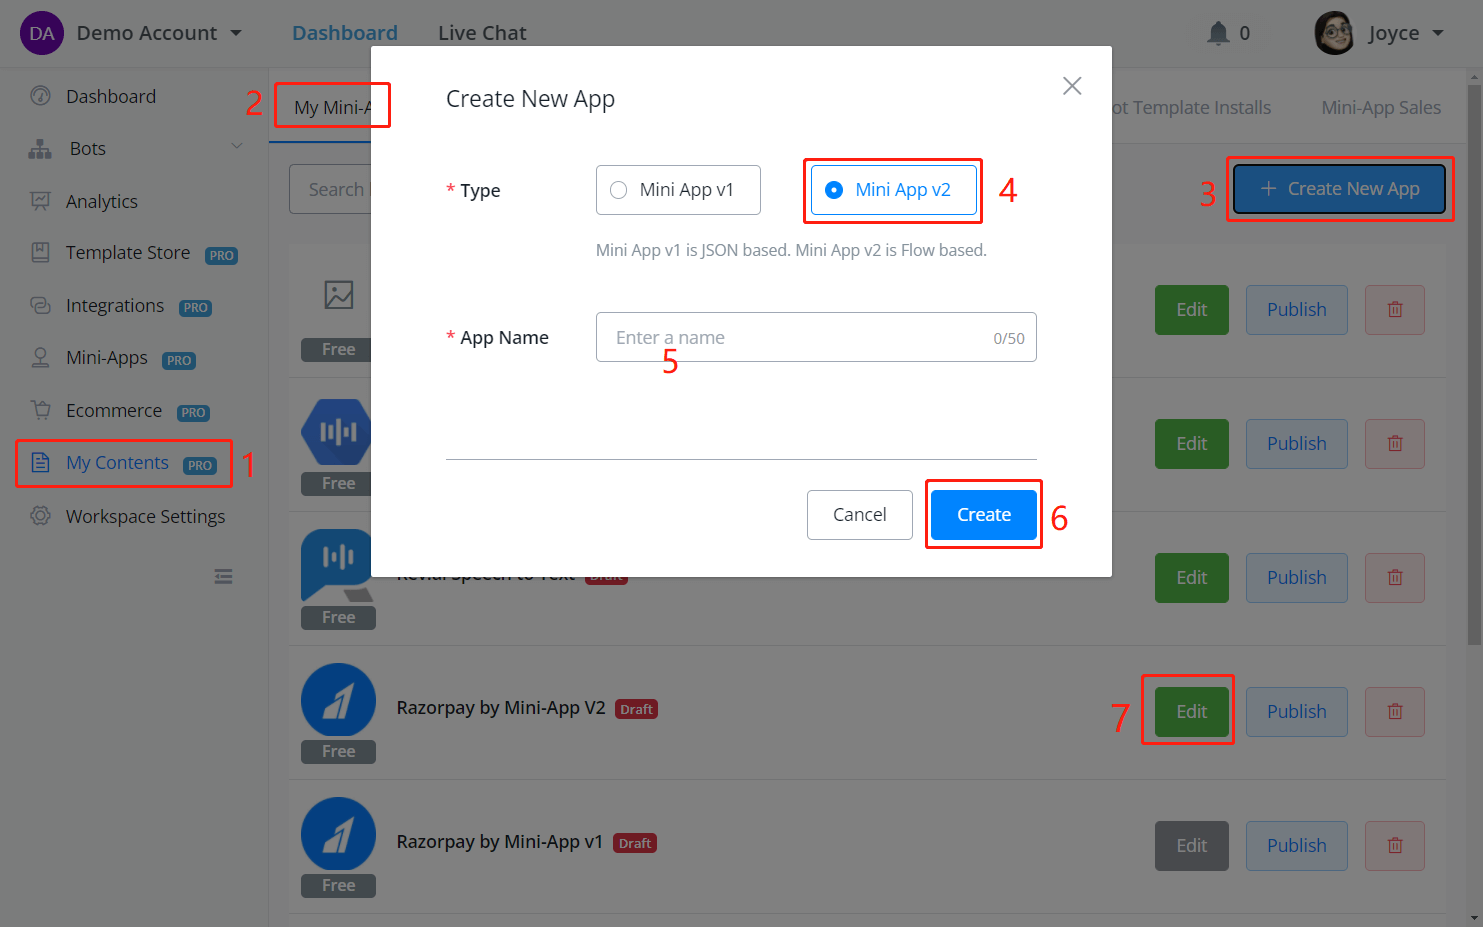
# Create New App

Follow steps 1 to 7 in the above screenshot to create a version 2 app and enter the app builder.
# Process Overview
Usually, an app is built in the following order:
| Steps | What to do |
|---|---|
| 1. Settings | set up basic app info |
| 2. Auth | set up app authentication(auth inputs) |
| 3. Actions | add app action, edit action info and specify action inputs |
| 4. Flows | edit subflows for the action, get action outputs |
| 5. Actions | specify action outputs |
| 6. App Fields | edit fields whenever you need to |
| 7. Triggers | add trigger if you need to |
| 8. One Time Urls | add one-time URLs if you need to |
| 9. Sources | add sources for action inputs if you need to |
| 10. Testing | install the draft app in your workspace and test it |
| 11. Publish | submit for review if you want it to be publicly accessible |
Full Demo Available
A payment gateway, Razorpay, will be used as an example of how to create and edit a Mini-App in version 2.0 from the very beginning to publishing. To learn with the demo, check Razorpay Demo. You might also want to check each section separately.
