# One Time Urls
One-time URLs are used to receive data. When you need a party to send back data to the app, you give them a one-time URL.
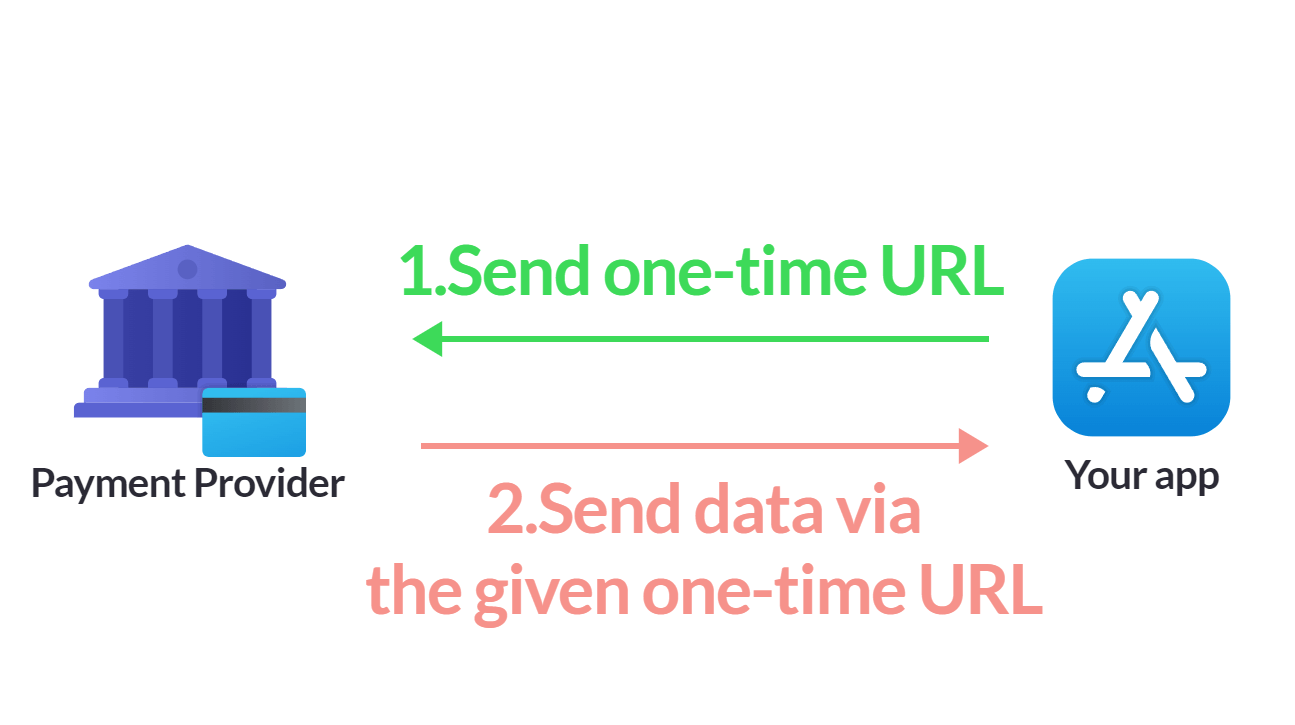
By generating an URL and sending it out, the app is telling others, to reach back, send the data to this URL.
This is convenient to receive data from anywhere and anyone. However, as the name specified, the URL is one-off. You will need to generate a new URL for each future reception of data. The URL expires after using or time up (5-60 mins, default: 10 mins).
A one-time URL consists of 3 parts,
| Part | Description |
|---|---|
| Parameters (optional) | To receive data and map them to app fields |
| Web Forms (optional) | To collect extra information via a web form |
| Web Page | To display confirmation messages for previous parts and call a subflow |
Note
Parameters and Web Forms sections are both optional. You are free to have a one-time URL only receiving data or only collecting data via a form.
# Create One Time Url
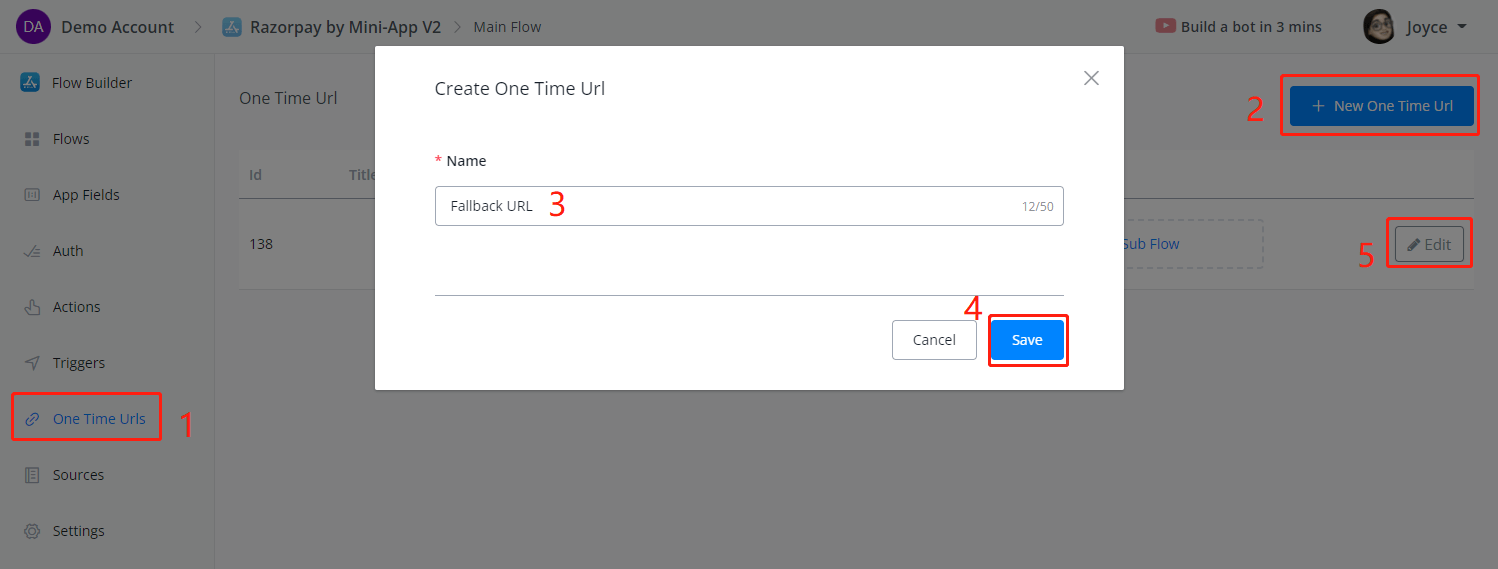
Follow steps 1 to 5 in the above screenshot to edit the One Time Url.
# Parameters
In the parameter section, you can see the Sample Json Payload area. Here is where you tell the app, what does the data to receive looks like. In that way, we can specify where to save the received data in advance.
You can fill in the sample JSON payload by
- manually put it in
- listen to real-time data
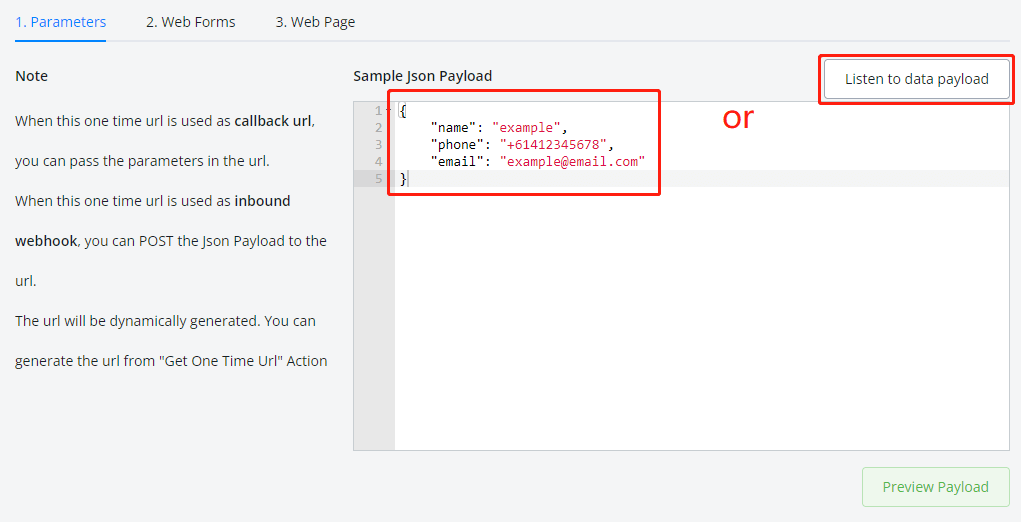
For example, in the screenshot above, the JSON data with 3 values included is manually put in.
To get real-time data, click on the Listen to data payload button and copy the sample URL for testing. One-time URL supports both the GET and POST method.

Give it a live test and attach this sample URL. For example, in your browser, visit:

You will see a blank page when you hit return since you haven't designed the confirmation Web Page yet.
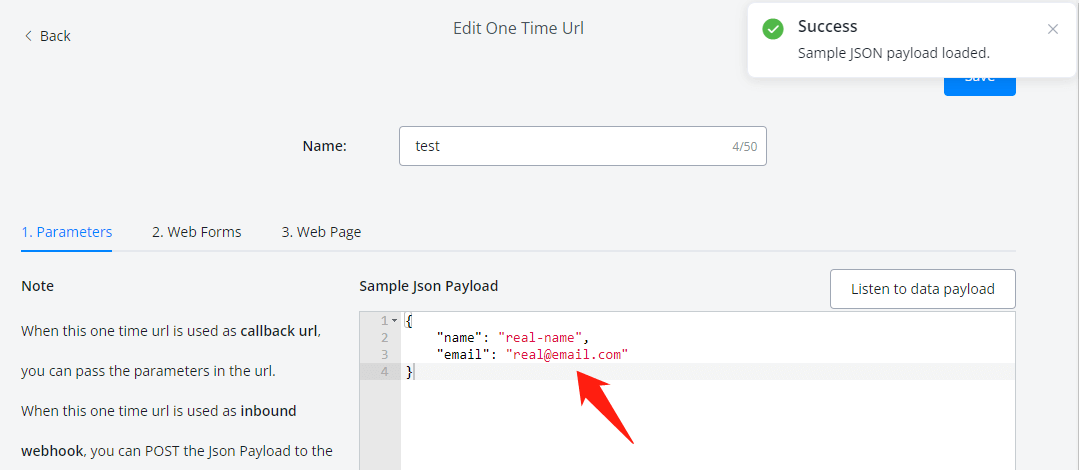
Back to the Listen to payload window after the test and click "Done":

You will see your real-time data received in the sample JSON payload area.
Click on Preview Payload and let's map them to app fields:
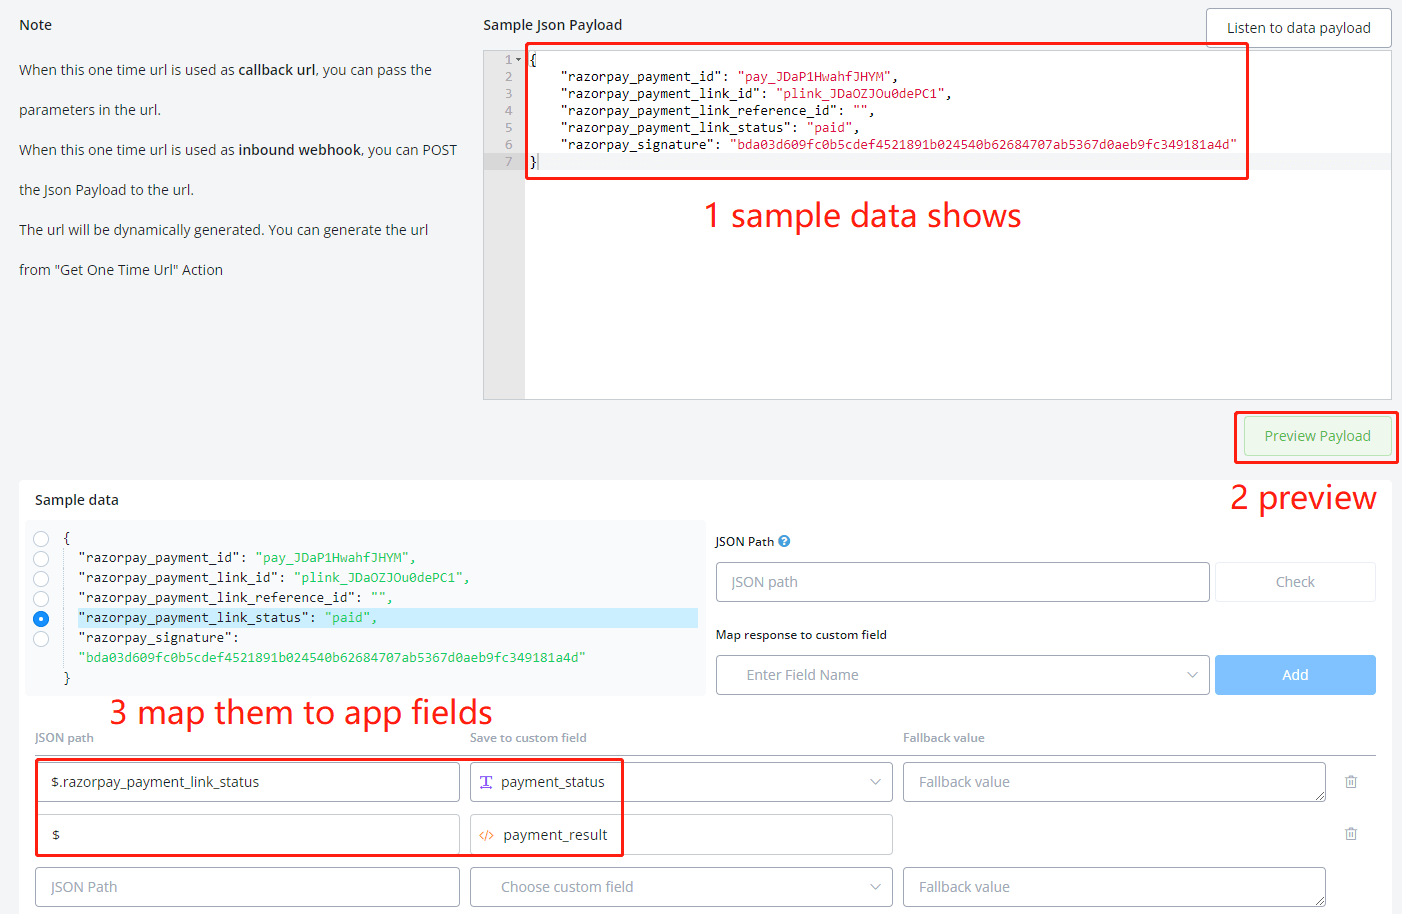
To map data:
- click on the data in the left-side sample data area
- JSON path shows on the right side
- create a new field by typing in a new name then click on the new name or search an existing field
- click on the Add button to add to the mapping list
# Web Forms
Click on Add Item to start adding inputs of the web form.
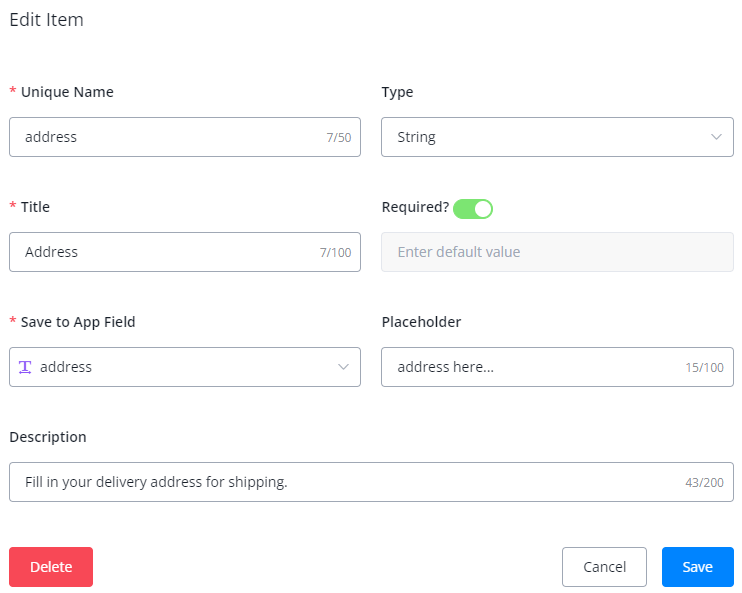
| Parameters | Description |
|---|---|
| Unique Name | Unique in all auth inputs, you are unable to insert a space. Use underscores or hyphens to separate words |
| Type | Choose String for text without carriage returns, Number for integer or float numbers, Text for text with carriage returns, Select for static or dynamic source input |
| Title | Title shows on the user interface |
| Required? | Is this input a must? if not, switch off and provide a default value if needed |
| Save to App Field | Specify where to store the value. Create a new app field right here by typing in a new field name and selecting a field type in the pop-up, or search an existing field |
| Placeholder | Grey prompt shows in the input box |
| Description | Black prompt shows under the input box |
Add as many web form inputs as you need, click on Save when you finish. Have a check on the Preview area.

# Web Page
Design a simple web page for displaying confirmation messages.
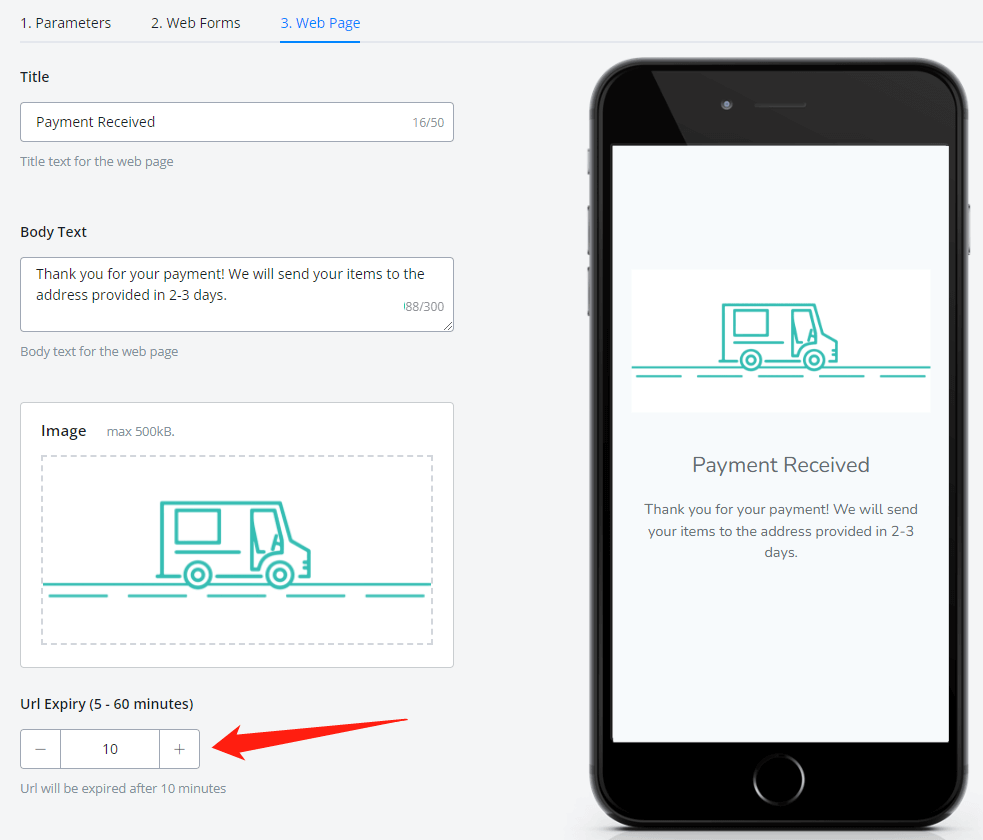
Choose an Url Expiry time for your one-time link from 5 minutes to 60 minutes. By default, the link expires in 10 minutes.
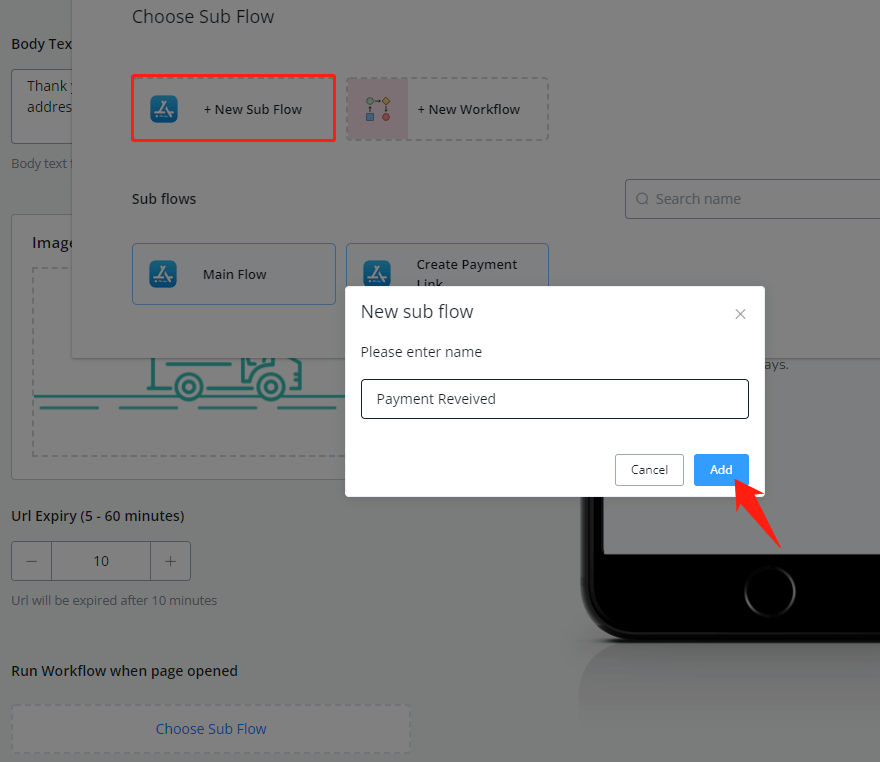
Finally, select a subflow to run after the web page is displayed.
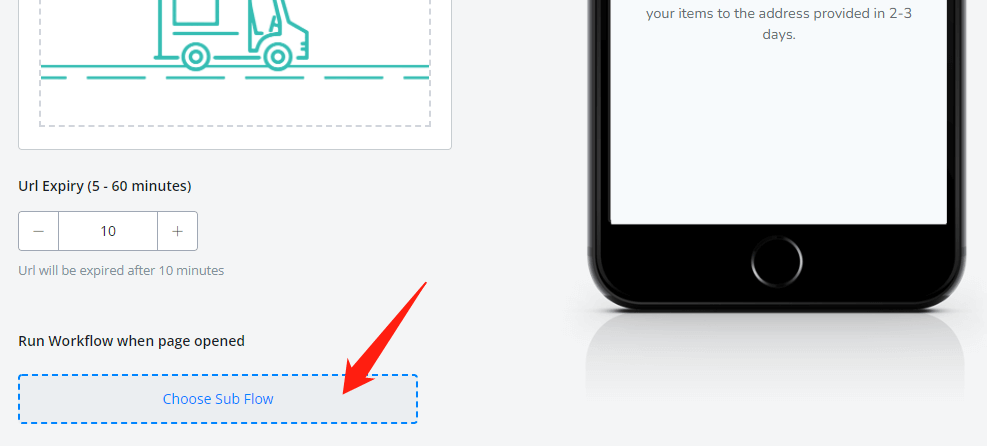
Usually, we fire a trigger in this subflow, to notify chatbots about the update.
# Generate One Time Url
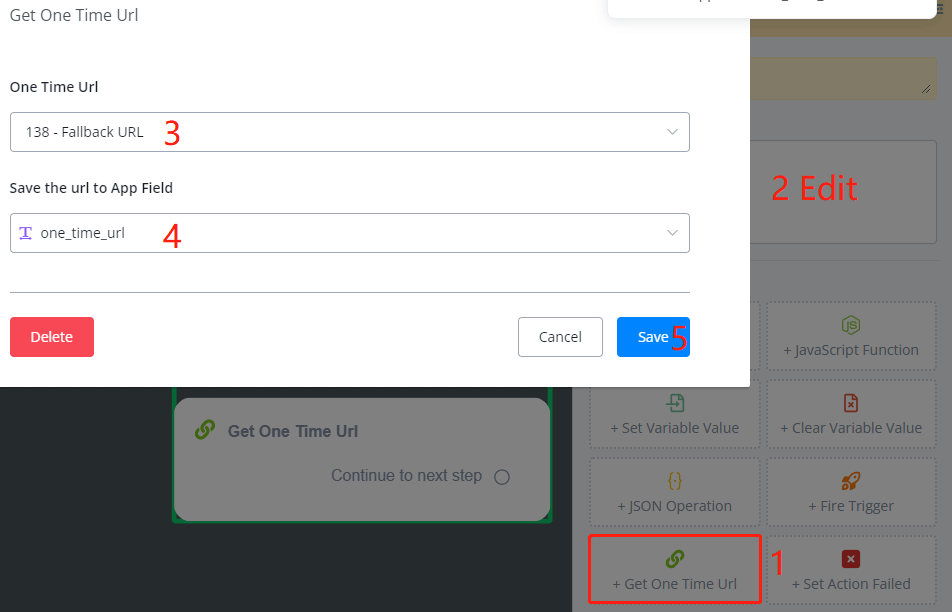
Use an Action Step to generate the URL and save it in an app field for sending out later.