# Sale Funnel Automation for Partners
In this section, you will learn how to set up the automation to bring new leads, and convert them into paying customers with UChat partner API.
You will be able to set up below automations:
Create new free trial account in your chatbot, any form that support webhook
Set up the onboarding automation
Get notification when the user subscribed to your paid plan
Set up win-back campaign automation when the user downgrade to free plan
Send notification to you & customer when their workspace plan auto-renewed
Send an auto reminder when the user’s workspace about to downgrade to a free plan
Send auto reminder if the credit in your wallet is too low
Enroll into the training course here (opens new window) for FREE!
# Checklist
In order to set up the automation, you will need:
- UChat partner plan
- Zapier or Make or Pabbly connect, etc
This video training course is based on using make to set up all the automations.
You will learn how to set up these automations with Integromat/make & UChat Partner API, If you don’t have make account, you can registrate a free account by click the link here (opens new window).
You will get 10k free operation if you subscribe to any of make’s paid plan in the first month.
# Outline of the training
Here is the overview of the full training plan:
# Overview
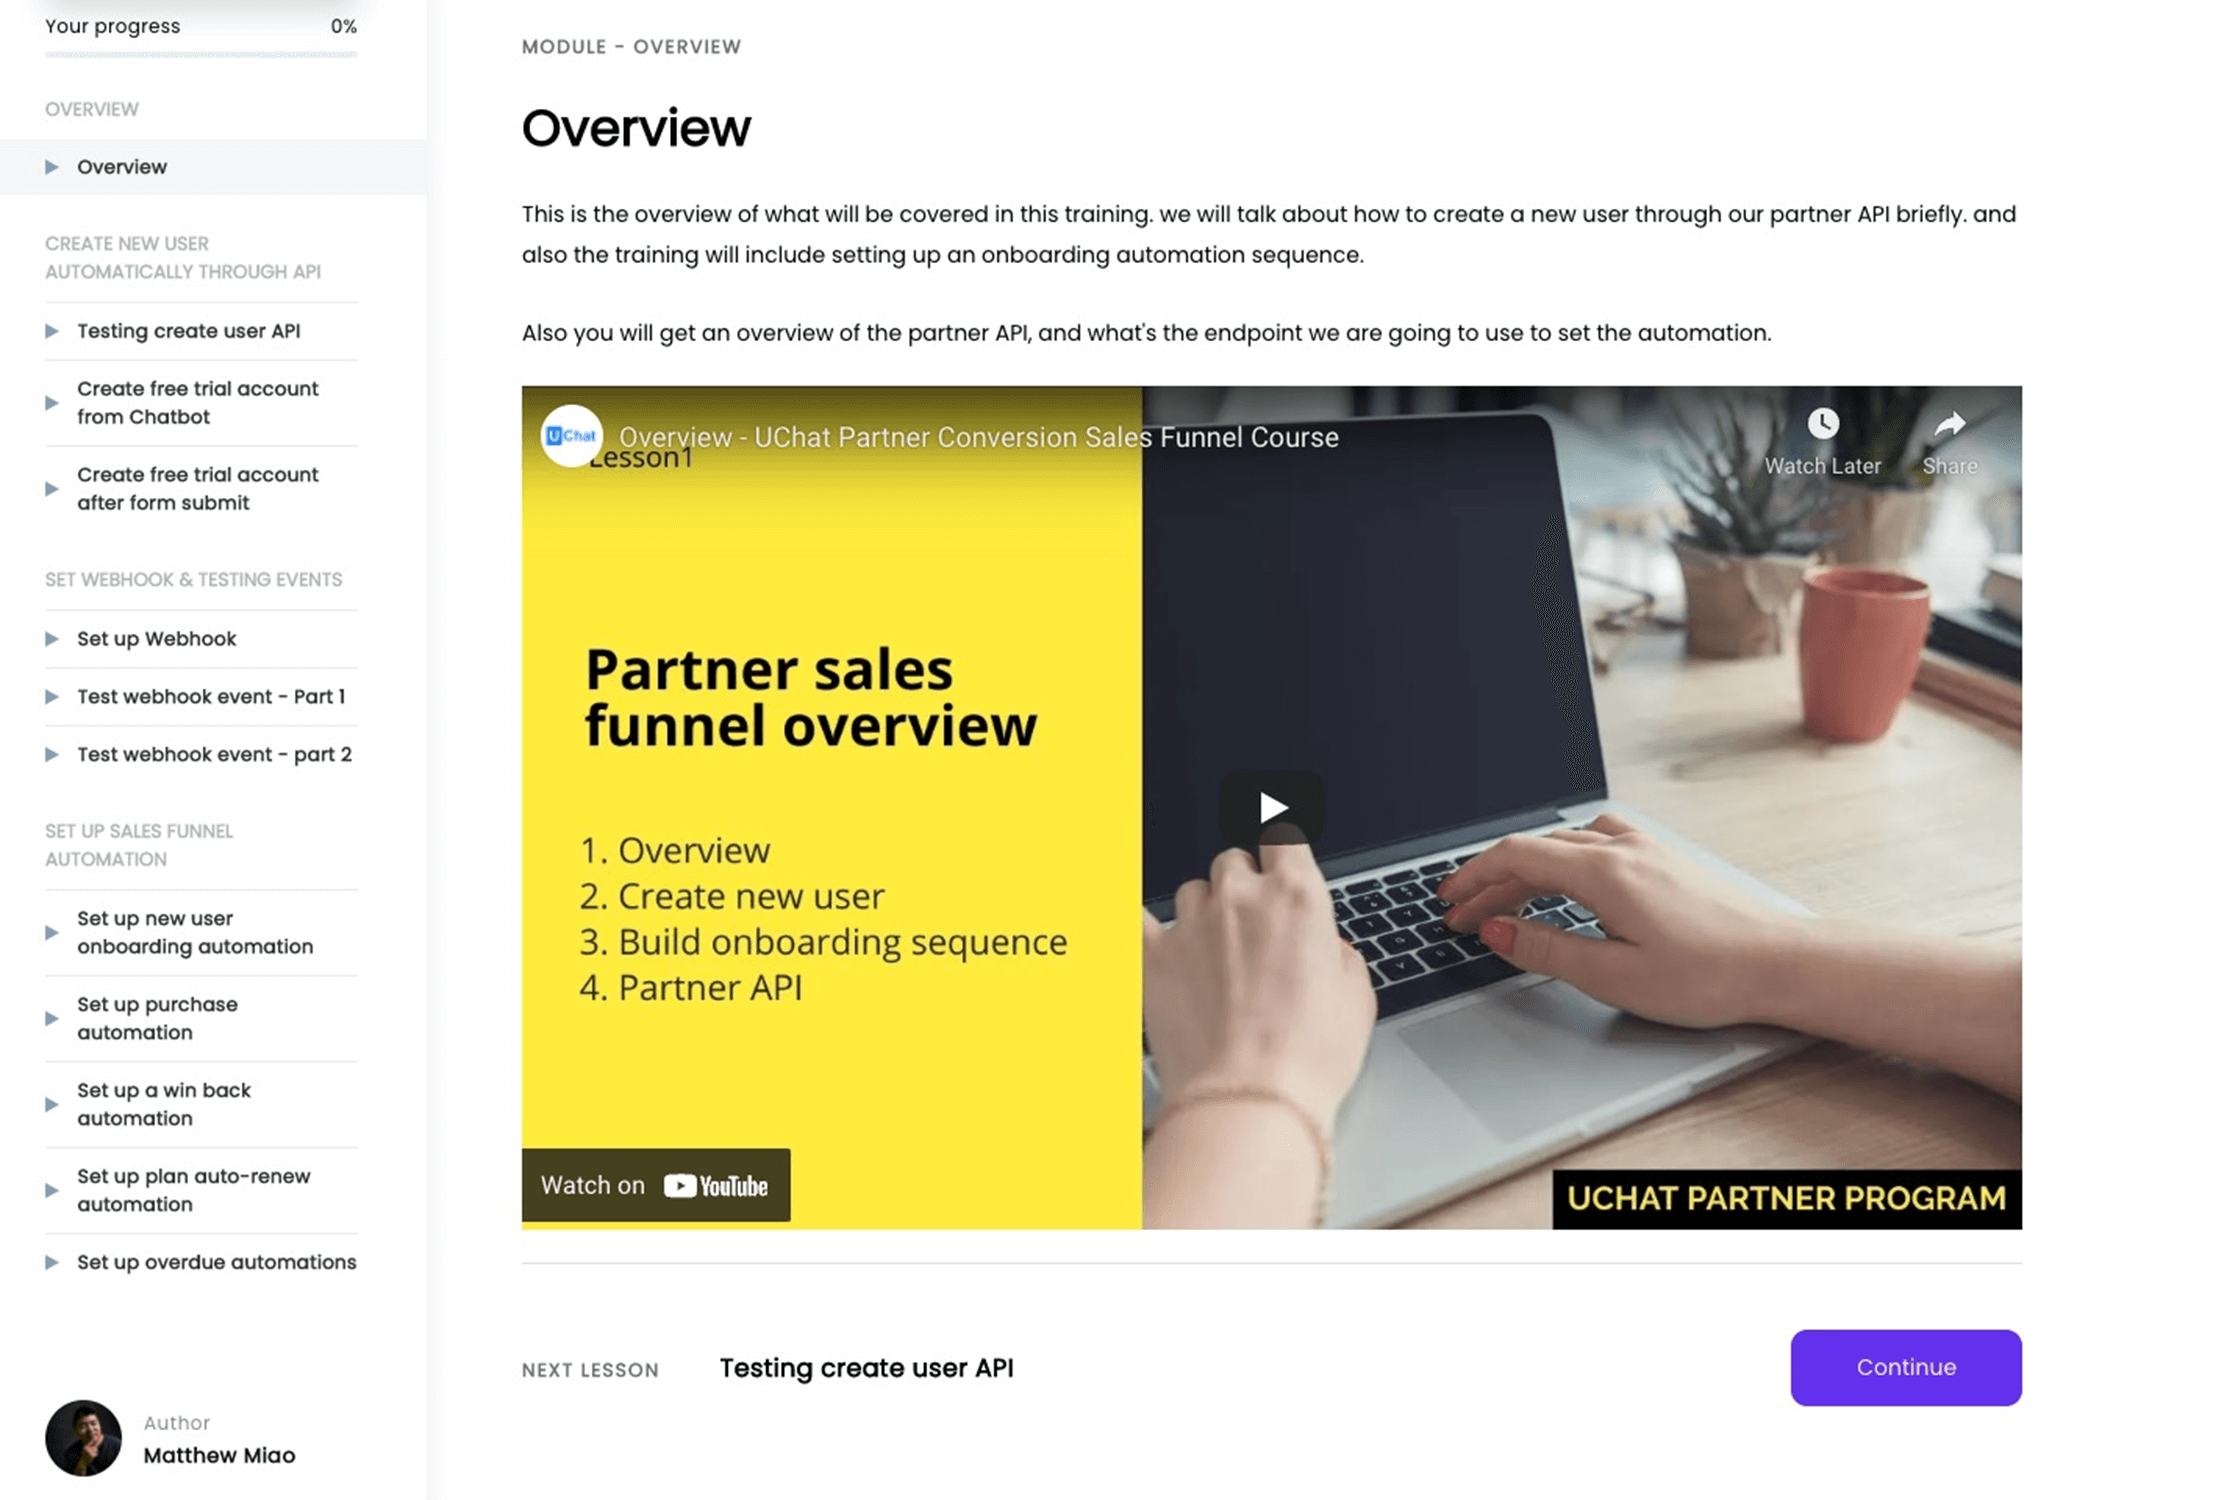
Here is a brief overview of what’s going to be covered in the following training. Also, you will get a brief overview of UChat partner plan API.
Check out the video below for more information
# Create new user automatically through API
For your information, every new workspace created under your custom domain will get 14 days free trial, access to all the pro features, no credit card required.
You will need to use the /partner/workspace/create to create the 14 days free trials,
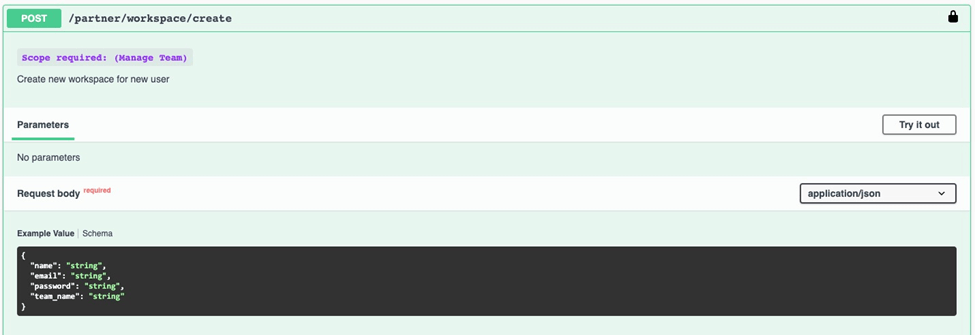
With UChat partner API, you can easily create a new user in your chatbot, or through any web form on your website or landing page. As long as the web form supports webhook, you can make it work.
# Test the create user API
In order to use our partner APIs, you will need first to get your API keys.
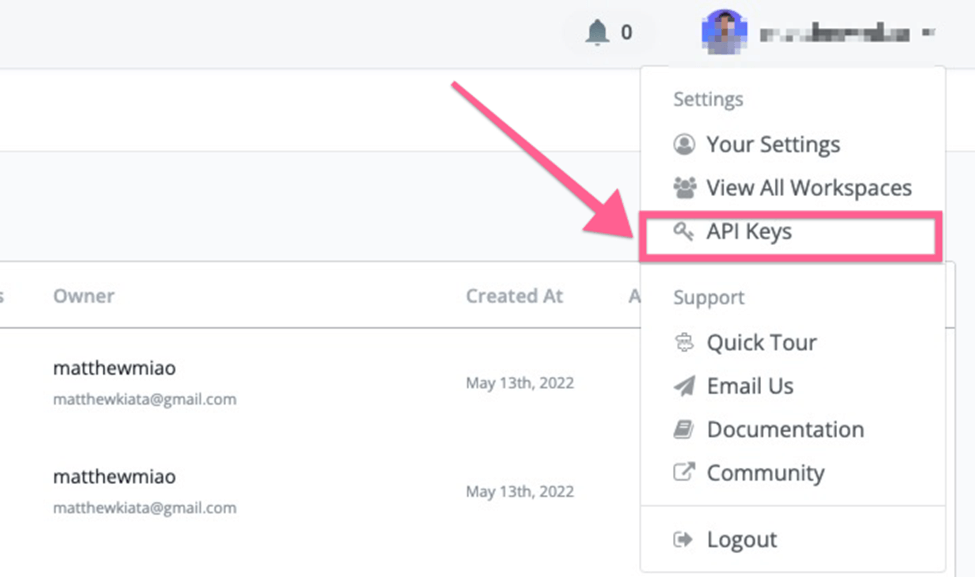
In your main workspace(the workspace has the white label settings), you can go to the top right corner of your dashboard, and then click the API keys.
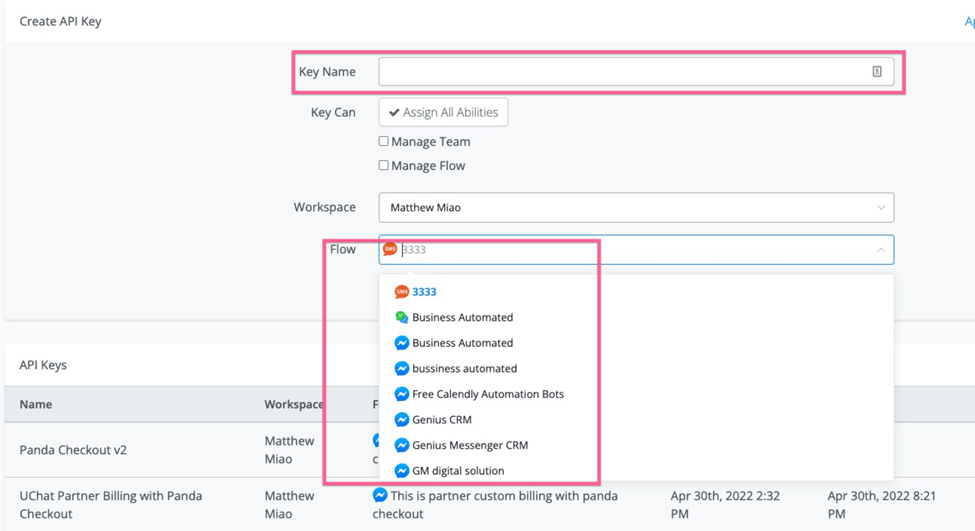
And then you can give the API key a name, and then select any of the flow in your main workspace:
# Authorize with your partner API
After you get your API keys, you can test with our partner APIs. Go to the URL here (opens new window).
And click the authorization button, and paste your API keys:
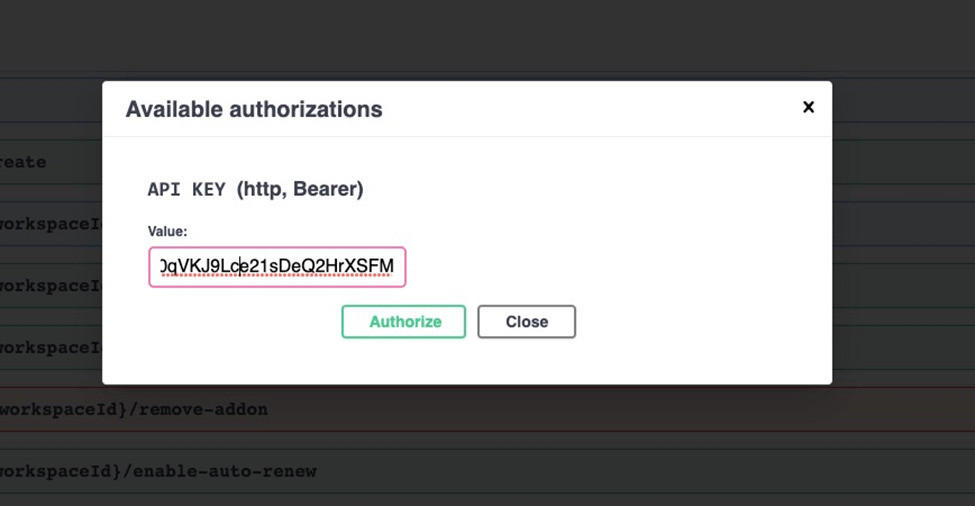
Check this video for more details about how to test with this API.
# Create a free trial account from chatbot
After you tested the create workspace API, now in this video, you will learn how to set up the same process right in your chatbot.
# Create a free trial account after form submit
If you are using any forms on your wordpress or your landing page, as long as the form submits a webhook(you can send the leads to the webhook), you create a free trial for the user right after the form submit.
Check the video below for more details
# Webhook & Testing Event
Depending on what platform you are using, you can create the webhook with Zapier, Integromat or Pabbly Connect.
# Webhook URL
In this video, we will talk about how to set up a webhook, and how to view & remove the webhook.
After you get your webhook url, you can call set-webhook API to set up the URl to your own webhook.
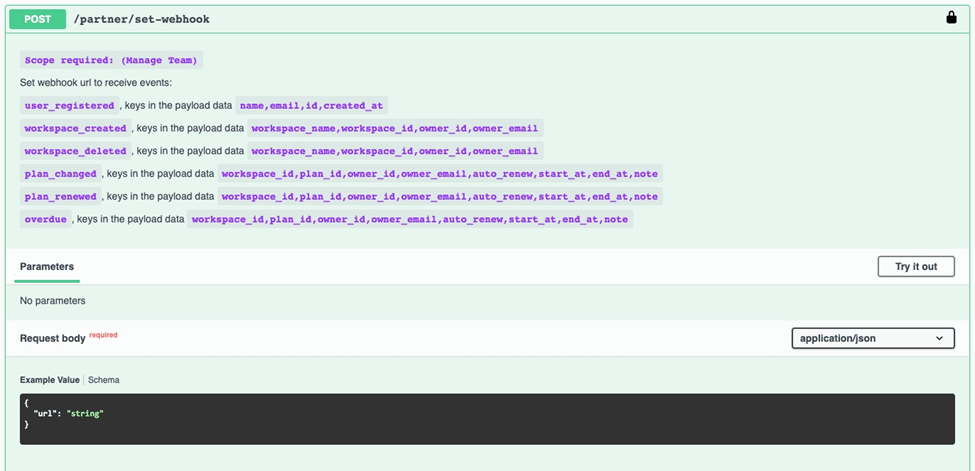
After you set up your webhook URL, you can receive the below events:
User_registered: This will trigger every time when there is a new user registered under your custom domain.
Workspace_created: In UChat, one user can create multiple workspaces or join the other user’s workspace. So this will trigger every time someone creates a new workspace.
Workspace_deleted: you will receive a notification every time you delete the workspace.
Plan_Changed: This will trigger when the user upgrades to a paid plan or downgrades to the free plan. You need to filter or use the condition of the planID to identify which actions are taken.
Plan_renewed: This will trigger every time any workspace gets renewed.
Overdue: There will be 2 scenarios when this will be triggered. The importance is the auto-renew status.
If the auto renew is 0, when this event got triggered, then it means that the current workspace is at the end of the billing cycle, but the auto renew is set to off. So the overdue event will be sent 3 times, 1 time each day.
After 3 days, the current workspace will be downgraded into the free plan.
As the partner, you can set up the automation to send the reminders to the owner & yourself. Because once the workspace is downgraded to the free plan, extra bot users will be deleted, there is no way to get them back.
If the overdue event is triggered with auto renew is 1, it means that you have a workspace on the auto-renew, and are able to charge credits from your wallet, but you don’t have enough credit in your wallet.
It might be a good reminder to yourself to set up this automation, otherwise, you might risk downgrading your customer’s workspace by mistake.
The overdue event will be triggered 3 times in total, 1 time each day. After that, If there isn’t enough credit in your partner's wallet, the current workspace will be downgraded into the free plan.
# Test webhook event - Part 1
In this video, we will test all the events that can be received to the webhook you have set up.
- user_registered
- workspace_created
- workspace_deleted
- plan_changed
More details you can find in the video below.
# Test webhook event - part 2
For an event like plan_renew & overdue, it's hard to trigger the event. So you can use the demo data below to trigger the request, and set up your automation in the following lessons.
Plan_changed demo data: { "event":"plan_changed", "data":{ "workspace_id":123, "plan_id":"business", "owner_id":234, "owner_email":"[email protected]", "auto_renew":0, "start_at":"2022-04-26", "end_at":"2022-05-26", "note":"plan_changed" } }
Overdue demo data: { "event":"overdue", "data":{ "workspace_id":123, "plan_id":"business", "owner_id":234, "owner_email":"[email protected]", "auto_renew":0, "start_at":"2022-04-26", "end_at":"2022-05-26", "note":"overdue" } }
Check the video below for more details.
# Set up Automation
# New User Onboarding
In this video, you will learn how to set up the automation in make.com.
You can do the same in Zapier or Pabbly Connect if you want, the logic is the same.
You can connect the new user with the email platform you are using through Zapier/Make/Pabbly Connect.
We are using encharge as an example in this video, but you can set up the same automation in your email platform.
# Purchase Automation
In this video, we will use the plan_changed event to set up the purchase automation.
And also you will learn how to improve your onboarding automation.
Use the condition checks, without sending the discount email when the user already subscribed to your paid plan.
# Win Back Automation
If the user downgrades to a free plan for whatever reason, it's time for you to set up a "Win back" automation.
You can ask questions about why they are canceling the subscription, or offer a zoom call to help them on a particular topic.
Also, you can offer discounts to get them back to your paying customers.
# Auto-renew
In this video, you will learn how to send notifications to yourself or to your customer about the auto-renew of the workspace.
# Overdue Automation
There are 2 scenarios when the overdue events got triggered. If the auto-renew =1, then it means that there is a workspace that needs to auto-renew, but if you don't have enough credits in your wallet, you need to put more money into your wallet.
If the auto-renew=0, it means that the workspace is about to be downgraded into the free plan. Since the auto-renew is off, these events will be triggered 3 times in 3 days. After that, If the auto-renew is still off, the workspace will be downgraded to a free plan.
If there are extra bot users(more than 200), extra bot users will be deleted, and there is no way to get them back.
You can set up your automation based on the information above.
