# Thrivecart (Custom Pricing Checkout)
UChat partners have the option to set up their own checkout pages, and in this section, you will be able to follow an example to set up the full automation.
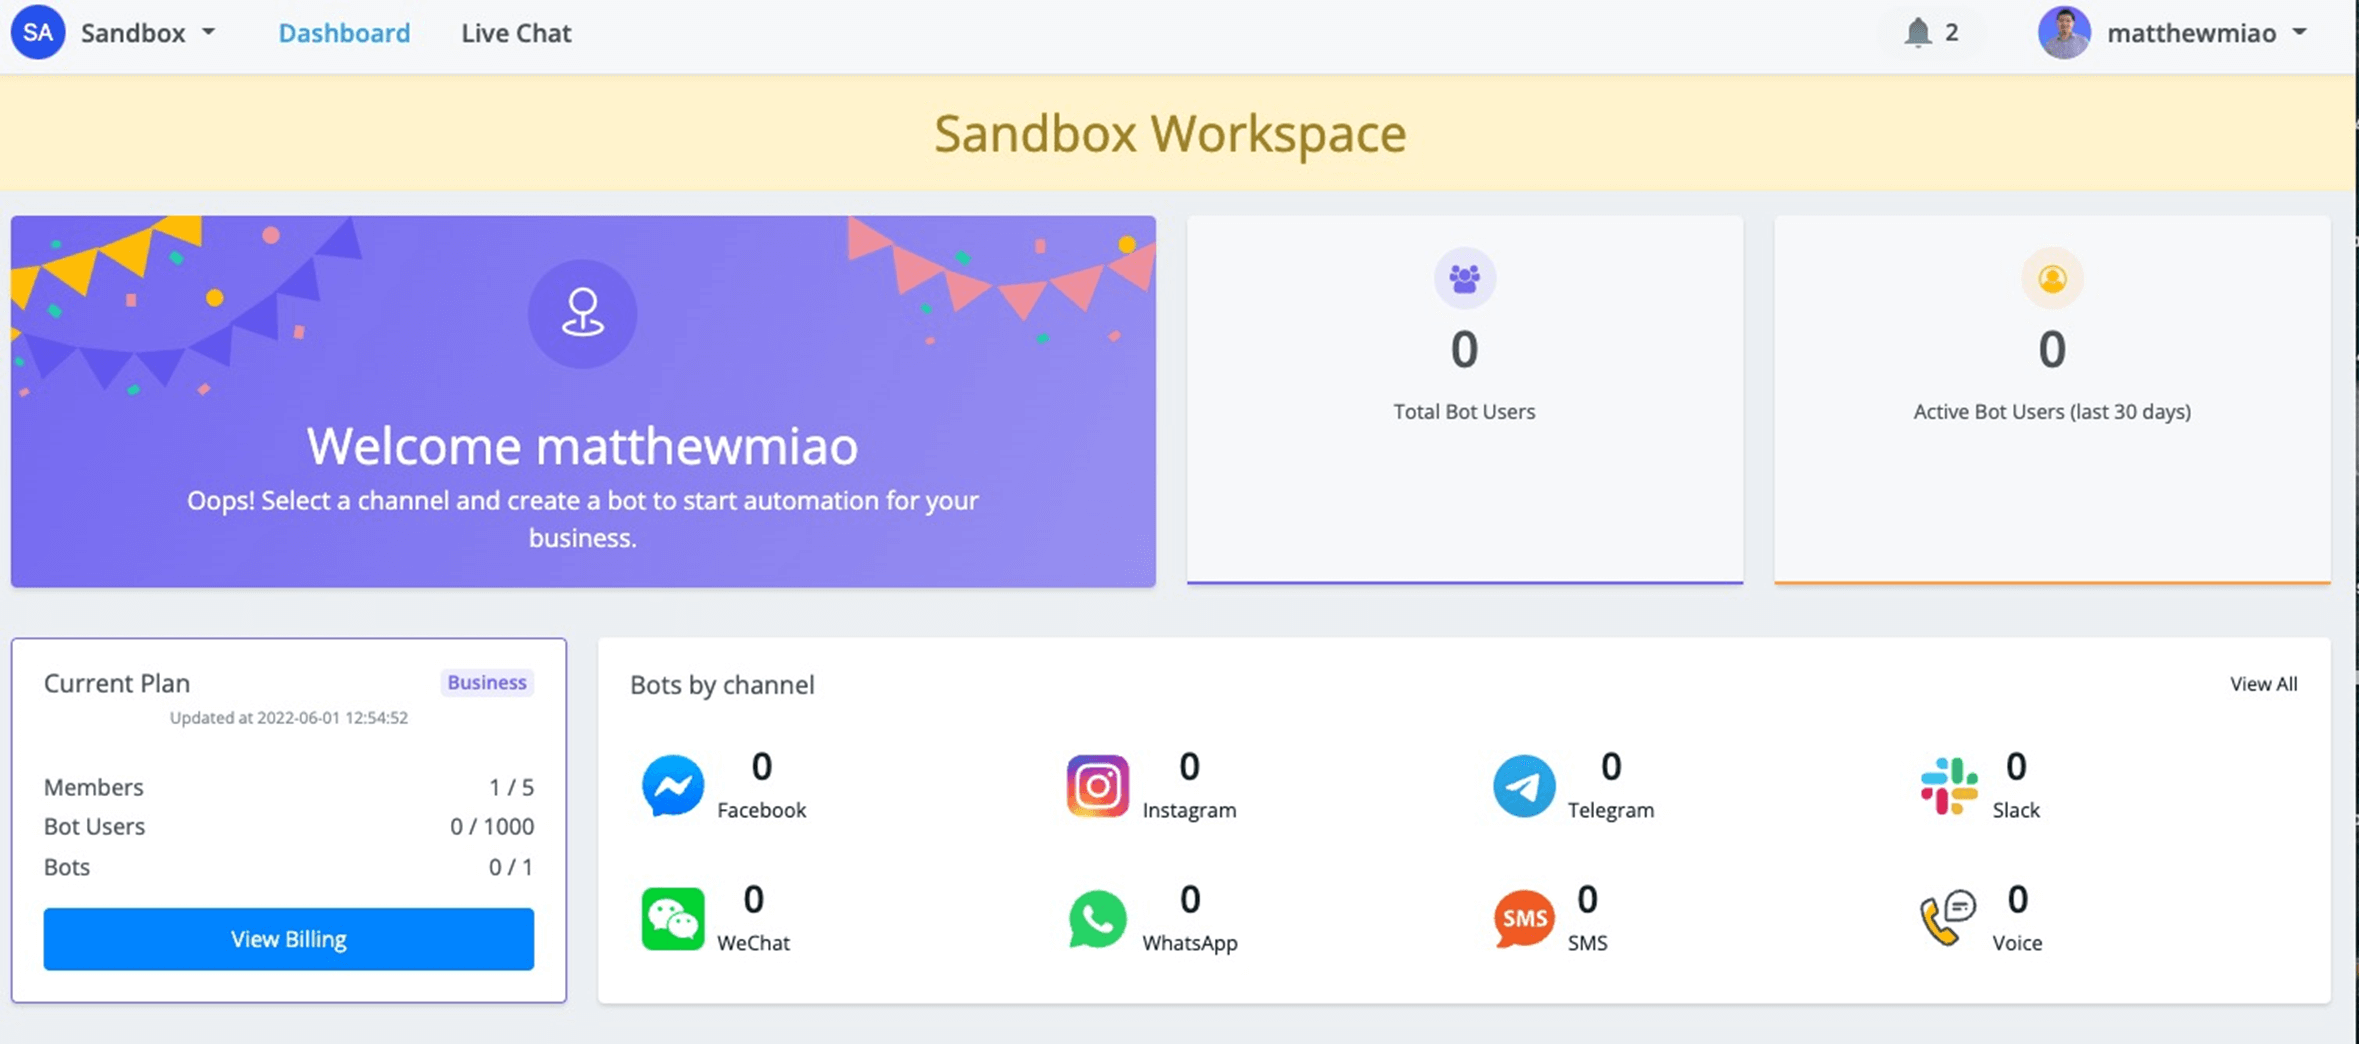
You will be able to automate the purchase, no matter whether the user is purchasing the main plan or add on. The workspace of your customer will automatically be updated right after the purchase.
Also if your customer wants to cancel the subscription, you will be able to set up automation to downgrade their plan or remove the add on they purchased.
At last, you can also set up the rebill failed automation, if the customer subscription fails, you will be able to downgrade their workspace or remove their add on automatically.
In this section, we show the step by step tutorials on how to set all these automation with Thrivecart. But you can do the same with the checkout options you have as long as they support triggers that you can use.
- Enroll into the training course (opens new window) for FREE!
- Check our free playlist on Youtube (opens new window).
# Demo
In this video, you will see the full customer checkout experience under your partner plan.
The user will be able to subscribe to your pricing plan, and you can keep 100% of the profit, and also at the same time automate the whole purchase, cancellation & rebill failure process.
Check the videos for a quick demo.
# Overview
The goal of this overview is to help UChat partners, and they can set up their own pricing & checkout page with Thrivecart.
And also they can set up the whole purchase & cancellation automation.
The important thing to automate the process is to collect the workspace ID on the checkout page, and then you can use our partner API to automate the process.
Check more details here in the video below:
# Checklist
Let’s first talk about what’s required to set up all these automations.
First of all, you need to join our partner program, which allows you to set up your own checkout page, and keep 100% of the profit. Plus you will have a full white label and much more customization.
Our partner program pricing is $199 per month.
You will also need a checkout solution, in this section, we are using thrivecart as the checkout platform, If you don’t have a thrivecart account yet, click here to purchase a lifetime deal (opens new window).
Thrivecart supports Stripe & Paypal accounts, and supports more than 130+ currencies, and also you can easily set up the one click upsell & downsells.
You also need a sandbox account, so that you can test without using the credits in your wallet. Reach out to support or UChat team for the access.
You can check the below video for more details:
# Thrivecart Checkout Pages
# Set up your own pricing & plans
In the following section, we will set up the thrivecart checkout pages, but first, let’s talk about how to set up your own pricing.
For partners, UChat offer below basic price to our partners:
- $10 per month for the business plan, which comes with 1 bot(you can use it in omnichannel), 5 members & 1000 bot users.
- $5 per month for every extra 1 bot
- $5 per month for every extra 1 member
- $5 per month for every extra 1000 bot users
- $30 per month for every extra 10000 bot users
For partners, if you want to set up your own pricing & plans. You can customize and design your different plans based on:
- Number of bots
- Number of members
- Number of bot users
For example, you want to set up a new plan, which contains 5 bots, 5 members & 11000 bot users. Start with a $10 per month basic business plan, which already includes 1 bot, 5 members & 1000 bot users.
Now, with the new plan, you want to add 4 more bots, the cost for that is $5 per month x4 = $20 per month; and also you added extra 10000 bot users, the cost for that is $30 per month, so the total cost for the new plan is $10/month + $20 per month + $30 per month = $60 per month.
Now, you can contact support to set this new pricing plan at the backend for your partner plan.
Check the below video for more details:
# Set up your checkout page
In this section, you will learn how to set up your thrivecart checkout page, and in order to set up automation in the following steps, you will also learn how to find the productID, and also don’t forget to add the finished checkout page to your billing URL in your partner white label settings.
Check the video below for more details:
# Set up Make & Thrivecart
In this section, we will briefly talk about make, which is the platform we are going to use for all the automation we are going to build. If you still don’t have an account, you can register from the link here (opens new window).
You need to create a webhook in make, see the screenshot below:
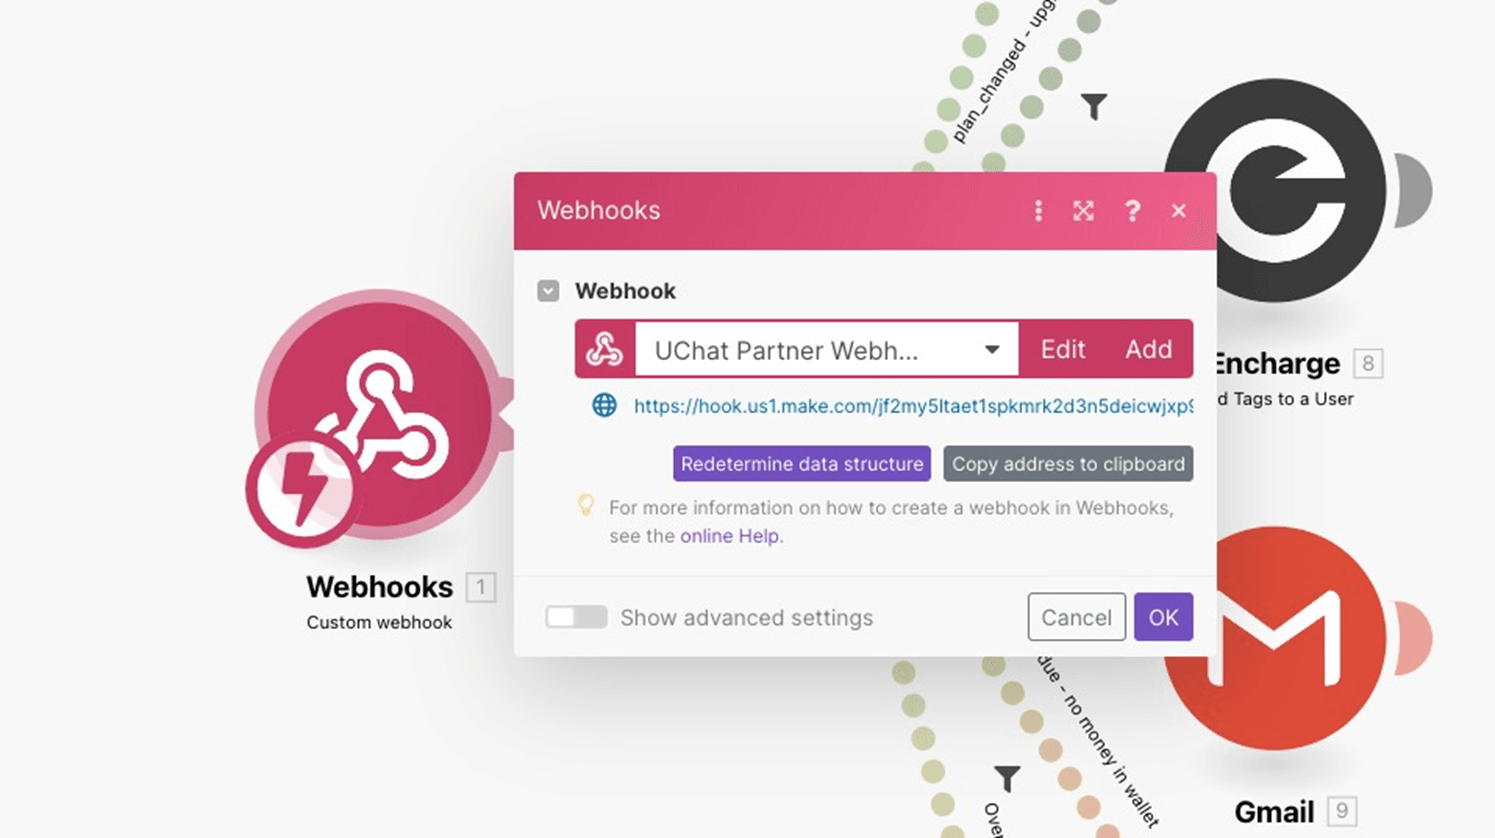
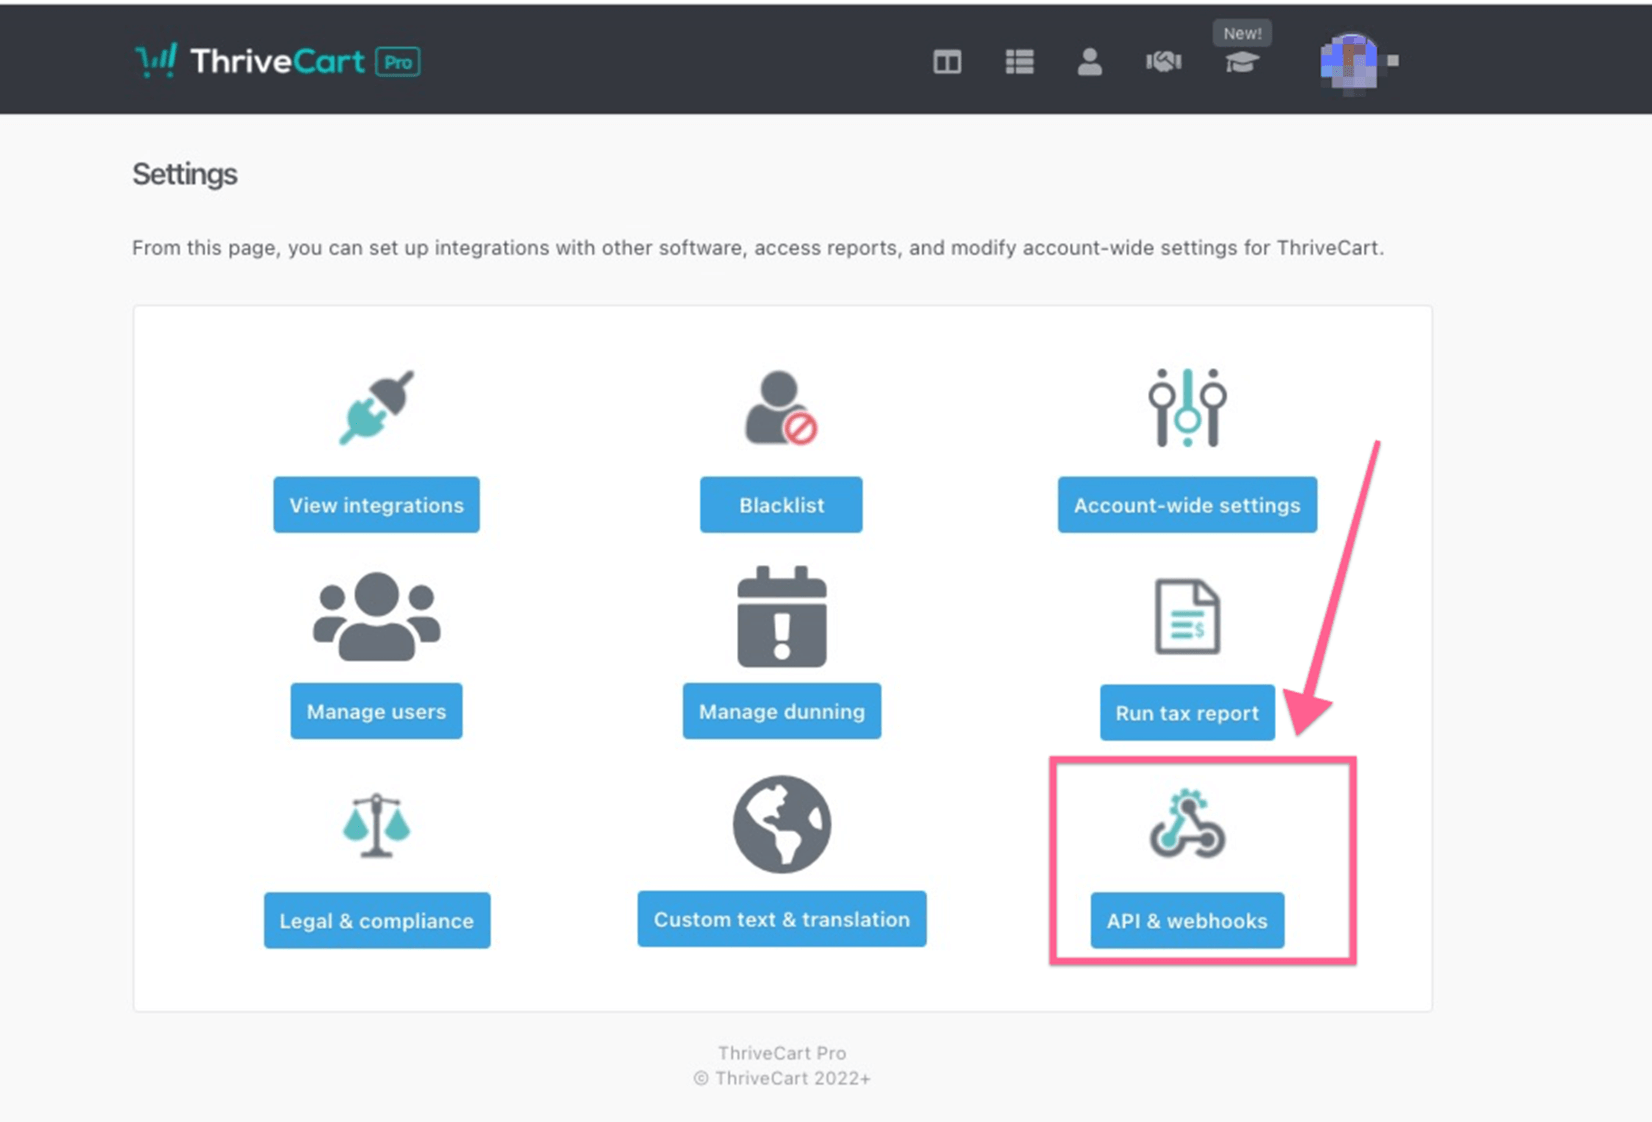
and then connect this webhook with your thrivecart settings, you need to go to API & webhooks.
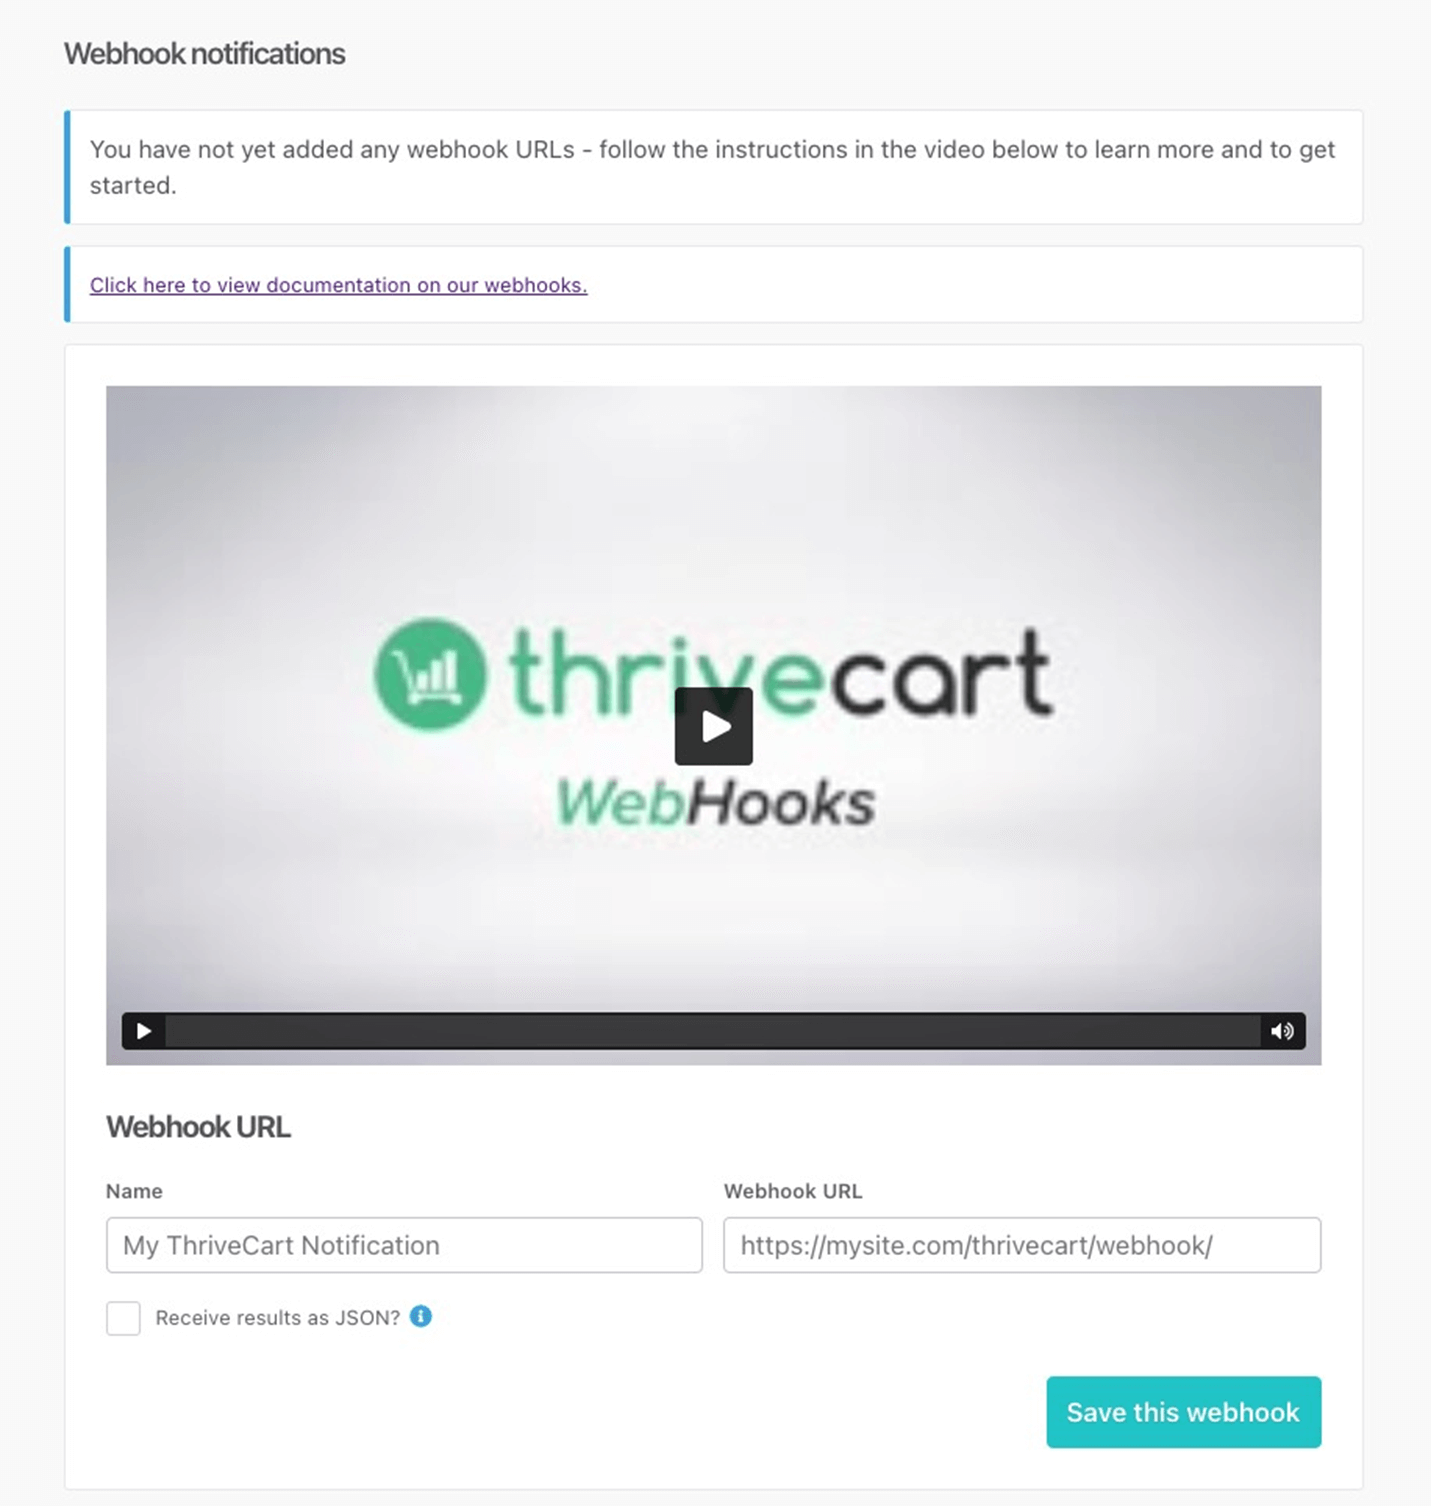
And then you can click webhooks & notifications to set up the webhook from make
Check the video below for more details
# Set up PayPal IPN URL
If you are selling subscriptions using Paypal, you need to know that your customer has the option to cancel directly from their Paypal account.
So you need to set up the IPN URL to capture the cancellation and refund request. More details you can find here (opens new window).
Please find more details here about how to set it up.
# Test UChat partner API
In this section, we will start testing the UChat partner API, you will first need to generate an API key from your main workspace(the workspace has the white label settings), please note this is only for our partner plan.
If you want to join our partner program, you can go to the billing section of your workspace, and subscribe to our partner plan.
# Test UChat partner API with swagger
In the section, you will learn how to use UChat partner swagger to test the below API:
- Test change plan API
- Test add add-on API
- Test enable auto-renew API
Check the below video for more details:
# Test UChat partner API in make
In the section, you will learn how to use UChat partner swagger in make:
- Test change plan API
- Test add add-on API
- Test enable auto-renew API
Check the below video for more details:
# Set up automation
In this section, we will start building the automation for purchase, cancellation & rebill fails. Watch the video tutorials to set up your own automations.
# Automate purchase of the main plan
In the section, you will learn how to set up the automation when the user purchases your main plan, and you can also sync the purchase details to your Google sheet for future reference.
In this automation, you will also learn to send customers first welcome emails.
Check the below for more details:
# Automate purchase of the add on
In the section, you will learn how to set up the automation when the user purchases your add-on plan, and you can also sync the purchase details to your Google sheet for future reference.
You will learn to set up the filter and then the automation to upgrade the workspace for the extra add-ons.
Check the below for more details:
# Automate cancellation
If you are using Paypal to collect subscriptions from your customer, remember to set up your Paypal IPN url, otherwise, you might miss a lot of refund, cancellation requests initiated directly from your customer’s paypal account.
There are 2 different ways to handle the cancellation, you can downgrade the customer’s workspace directly to a free plan, or you can turn off the auto-renew to off.
The first option, your customer will immediately downgrade to a free plan, and the second option, they will still get access to the workspace until the end of the current billing cycle.
Check the below video tutorials for more details:
# Automate the rebill fails
Set up the rebill fails automation is very important, you can find more Thrivecart events (opens new window) here.
You can do the same automation like purchase cancellation or you can set up the reminder and then follow up with your customer manually.
Check the below video tutorials for more details: